Thank you for participating in the first ever Humanities Commons Summer Camp! No matter your level of engagement with the summer camp, we want to hear from you. By answering the questions below, you can help us to develop future programs like the summer camp to better help our users take advantage of HC and strengthen their digital presence.
The survey is short and should not take more than 5-10 minutes of your time. You can choose to provide your email address at the very end to enter to win your very own Humanities Commons platypus! You have until Wednesday, 8/29 to complete the survey. Winners will be announced on Thursday, 8/30. Otherwise, the survey is completely anonymous.
This platypus is looking for a new home!
Thanks again for your help and participation- we really appreciate it.
To complete our fourth mini-challenge, you will need to explore a few of the plug-ins that Humanities Commons sites offer. HC sites are WordPress sites, so if you have any questions, general resources related to creating WordPress sites would probably be a helpful place to start. It is important to know that there are some limitations in terms of themes and plugins that HC can offer because of the complexity of the multinetwork system on which HC is based. In other words, not all plugins (or themes) under the sun can be utilized, however, there are quite a few that may be of interest…
How do I install plug-ins to my Humanities Commons site? How do I know what my options are?
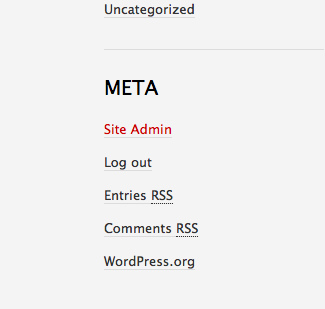
To find the plug-in page, you must first get to your site’s dashboard. To do this, you can either append “/wp-admin” to your site’s url or click on “Site Admin” located on the “Meta” menu (this menu appears in different places depending on the theme your site is using, but it should be somewhere on your homepage).
Choose “Site Admin” to go to your site’s dashboard.
Once on your site’s dashboard, you can select “Plug-Ins” from the left-hand menu to take you to the plug-in page.
Choose “Plug-Ins” from the left-hand dashboard menu.
On the plug-in page, you will see a list of all twenty-six plug-ins currently available. To install any of these plug-ins, simply click the “Activate” link attached to the specific plug-in you desire.
The plug-ins pageOne way to activate a plug-in for your site is to click the “Activate” link attached to your desired plug-in.
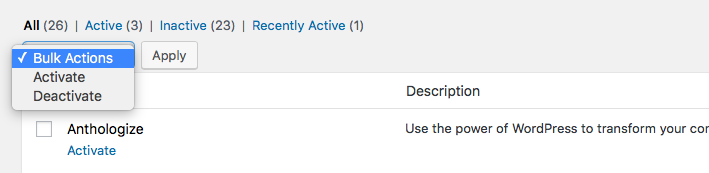
You can also use the “bulk actions” menu to activate multiple plug-ins at once.
To activate multiple plug-ins at once, use the “Bulk Options” drop-down menu
Because describing each and every one of these plug-ins would result in a blog-post longer than anybody wants to read, I’m going to highlight four of my favorites. If you want to learn about the plug-ins that I don’t cover in this blog-post, explore the different options on your own and let us know what you’ve found by posting a discussion thread on the HC Summer Camp group page. You can also feel free to ask questions about any of the plug-ins on our group page, Twitter, or via email. You can find our contact information at the very bottom of this page.
Featured Plug-In #1: Commentpress
Listed as “Commentpress Core” on the plug-in menu, this is a powerful plug-in that allows readers to comment on the work published on the site. This plug-in works particularly well if you want to invite feedback onworks-in-progress, or encourage discussion on more finished work. Commentpress is unique from the other plug-ins in that it functions as both a plug-in as well as a theme. This means that upon installation, Commentpress will completely change the look of your site to match the Commentpress theme. Only activate this plug-in if you want your site to take on the “Commentpress look!”
If you’re curious to see what Commentpress-enabled sites look like, below are a few great examples:
By activating the Commentpress plug-in, visitors to your site will be able to comment on posts at the paragraph-level. Because of this power, the Commentpress plug-in is probably most useful for project and course sites.
If you have an article, seminar paper, dissertation, etc. that is a work in progress, using the Commentpress plug-in is a great way to crowdsource feedback. I’ve also seen this plug-in effectively used for conference panel sites that share the abstracts and/or conference papers of the speakers. Finally, I can imagine this being an effective tool to use on a class website. If your students are comfortable sharing their work publically, this could be a great way for them to receive feedback on their work from each other as well as from Humanities Commons members.
Featured Plug-In #2: GoogleDoc Embedder
The GoogleDoc Embedder allows you to embed documents (including, but not limited to, PDFs, MS Office, and ZIP files) seamlessly on your site using the Google Docs viewer. This is a great way to include your CV, syllabi, publications, and more, directly onto your site. You have the additional option of allowing visitors to download the files from your site’s page or not.
Using the GoogleDoc Embedder is super easy. After you’ve activated the plug-in, you should see a Google icon above your text box whenever you create or edit a post or page.
The GoogleDoc Embedder icon should appear while editing posts and pages.
Here are some examples of the GoogleDoc Embedder in action:
The WP-Polls plug-in allows you to embed polls into your posts. Visitors of your site can respond to your poll (you can customize your polls so that only registered users, only guests, or both can vote) and you are able to immediately view the results.
In order to create an embed a poll, after the plug-in is activated, go to your site’s dashboard, hover your pointer over “Polls” at the bottom of the left-hand menu, and select “Add Poll.”
Choose “Add Poll” to create a new poll for your site.
You will be taken to the new poll form. Once you’ve filled out the form, click the blue “Add Poll” button at the bottom of the page. You will be given a Poll ID code, which you should copy and paste into the page or post in which you’d like the poll to appear.
You will be given a shortcode for your poll.Copy and paste the provided short-code into the post or page.
Although I haven’t used this plug-in yet, I’m really excited to use it in my course site. I think this could be a great way to survey my students to get a better understanding of their experiences and interests. I may also use these polls as a way to quickly test for understanding.
I wasn’t able to find any examples on other HC sites of the polls plug-in, but here is my test poll (feel free to vote if you want 🙂 ).
Featured Plug-In #4: Zotpress
The Zotpress plug-in is a great way to cite sources accurately and quickly on your site. It works by connecting your site to your Zotero account. If you don’t have a Zotero account or don’t know what Zotero is, I highly recommend that you check it out! Because it helps with citation, the Zotpress plug-in is probably best used for blog sites or sites publishing work.
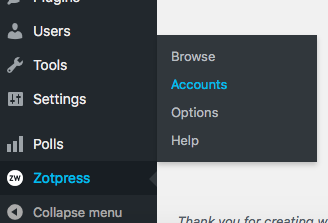
In order to use Zotpress, once it’s activated, go to your site’s dashboard, hover your pointer over “Zotpress” at the bottom of the left-hand menu, and select “Accounts.”
First choose “Accounts” to get your Zotpress plug-in started.
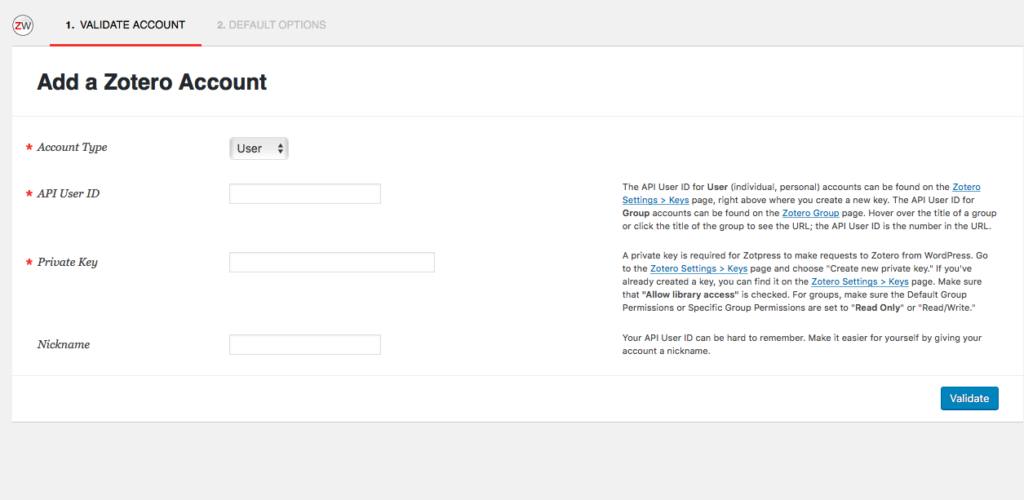
Once on the Zotpress page, click on the “Add Account” button on the right of the screen to sync your Zotero account to your site.
Choose “Add Account” located at the top right of the screen.Provide the needed information so that your Zotero account is synced.
Once this is complete, you will be able to easily include citations (both in-text and bibliographies) on your posts using the Zotero tool which should now appear whenever you are editing or creating a post or page.
The Zotpress tool should now appear whenever you create a new page or post.
Share and Reflect
Please share any discoveries or questions that emerged as a result of exploring the available WordPress plug-ins on our group page, especially if you fell in love with a plug-in not discussed in this blog post!
If you have any questions or if you run into any issues as you complete this challenge, fear not! Your camp director is here to help. Reach out to the Humanities Commons Summer Camp through any of the following contacts:
Humanities Commons: Post your question/concern as a new discussion thread in our HC Group.
For our third mini-challenge, I want to introduce you to a really nifty tool that helps users gain insight into the digital “buzz” that their scholarly work has received. Because Humanities Commons attaches a DOI to each CORE deposit, the analytics surrounding anything you upload to CORE can be tracked displayed using two free tools designed and provided by Altmetric.
Bookmarklet for Researchers
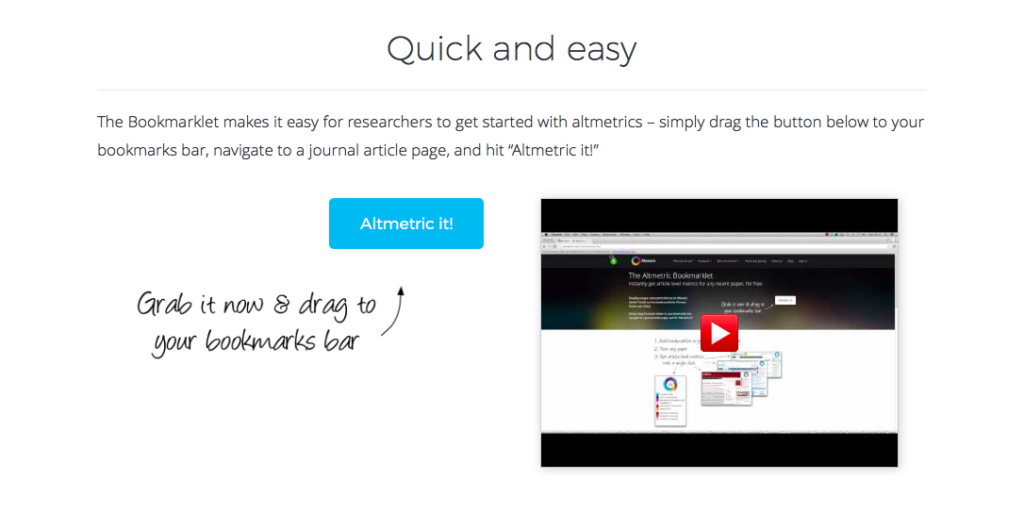
The first tool is Altmetric’s “Bookmarklet for Researchers.” By adding this to your bookmarks toolbar, you will be able to immediately access metrics for any article attached to a DOI. To get started, first follow Altmetric’s handy one-step guide to installing the Bookmarklet.
The one-step guide you will find on Altmetric’s site.
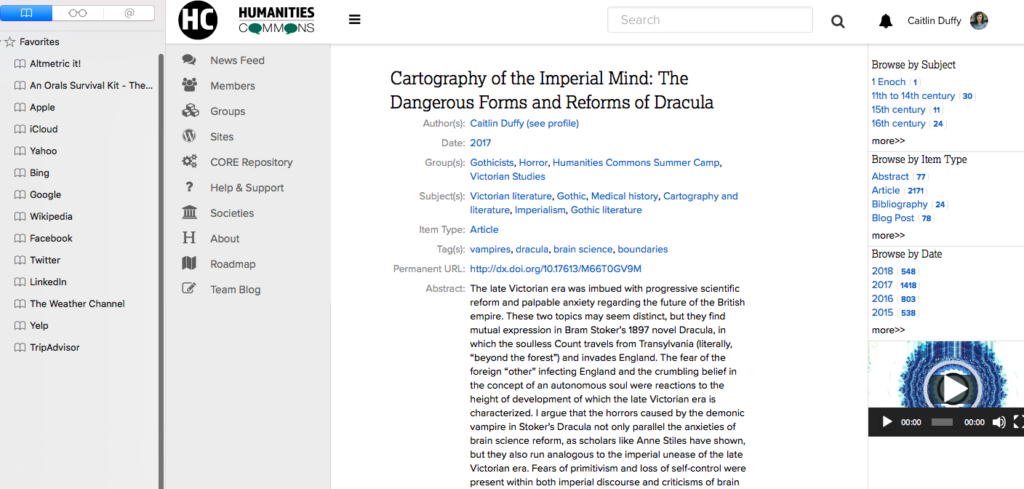
Once you have the Bookmarklet on your toolbar, take it out for a test run! Go to (one of) your (or anyone else’s) CORE deposit page and click “Altmetric It!”
The “Altmetric it!” tab is right at the top of my browser’s bookmark list.
You should see a doughnut-shaped graph and a counter, both of which reflect the number of digital “mentions” your deposit has received.
At the top right of my screen, the Altmetric doughnut has appeared!
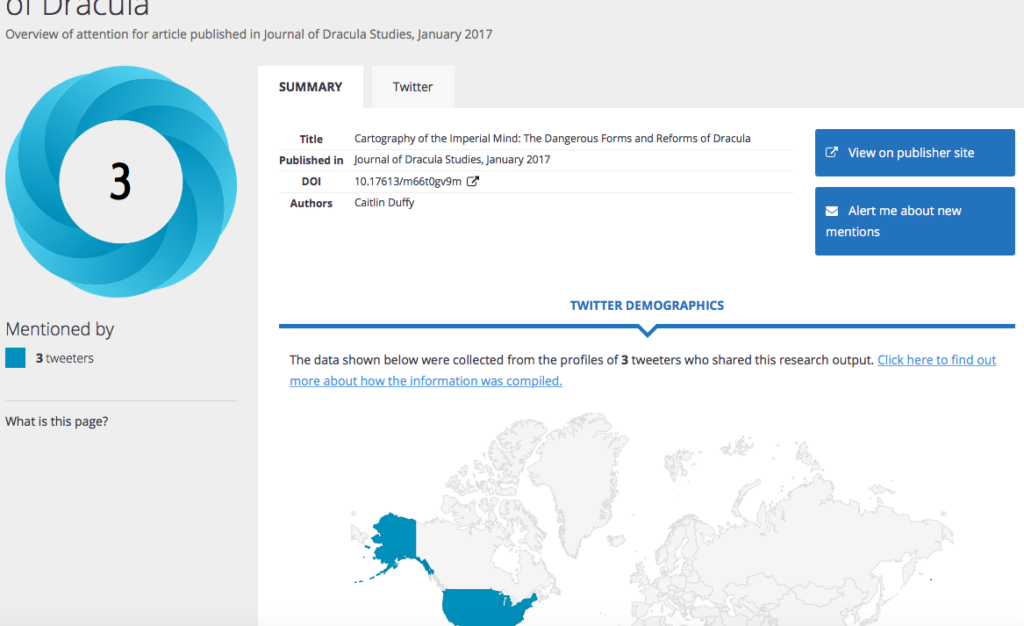
If you select “Click for more details,” which appears below the visualization and counter, a new page opens which contains even more information regarding your deposit’s digital life. Along with the doughnut graph and counter, you should now see demographic and geographic breakdowns of your deposit, as well as an option to view any posts that were made about it on a number of social media platforms, including, but not limited to, Twitter, Facebook, and Reddit.
After selecting “Click for more details,” I was taken to this page, which shows me even more information regarding the digital presence of my recent CORE upload.
I was recently really excited to learn about this tool for a number of reasons. First, you can learn more about the people who are downloading, sharing, and discussing your work online using the demographic and geographic visualizations. Secondly, the ability to look through a feed of the posts made about your work allows you to see (and, if desired, join) the discussion that your deposit has generated. As I’ve only just uploaded an article to CORE, I haven’t used Bookmarklet yet for my own work. However, I’ve noticed that the information provided by this tool is also helpful when looking at the work of others. For example, when I find a CORE deposit that really interests me, I use the Bookmarklet to see if a digital discussion surrounding the work exists so that I can join it or gain further insight on the work’s topic through reading the opinions and reactions of others.
Badges for Individual Researchers
If you discover that your CORE upload has generated a lot of discussion online, you should absolutely showcase the reach and influence of your work. The second free tool that I want to share with you for this mini-challenge is Altmetric’s free badges for individuals. These badges help you to easily add context and demonstrate the reach of your scholarly work to visitors of your site or online CV.
In order to add Altmetric badges to your site or online CV, follow the quick two-step process outlined on the Altmetric site. You basically just need to choose the type of badge you’d like, copy and paste the provided embed code to your page’s html, and let Altmetric know that you are using their badges.
The Altmetric page on individual badges provides a few examples of CVs and personal sites with embedded badges: (1), (2), (3).
The ability to provide quantifiable evidence of the importance and influence of your work will be a powerful addition to your professional site or digital CV. Once you’ve added these badges, anyone can quickly click and view all of the same information that the Altmetric Bookmarklet provides, even if they don’t have the Bookmarklet in their toolbar.
Share and Reflect
Please share any discoveries or questions that emerged as a result of exploring these two Altmetric tools. In particular, if you noticed any benefits not covered in the blog post, please tell us about it on our group page!
If you have any questions or if you run into any issues as you complete this challenge, fear not! Your camp director is here to help. Reach out to the Humanities Commons Summer Camp through any of the following contacts:
Humanities Commons: Post your question/concern as a new discussion thread in our HC Group.
Interested in completing an extra networking challenge?
Our second mini challenge involves creating a Humanities Commons group of your own.
Why Should I Create a New Humanities Commons Group?
There are a number of reasons you might start a new group on Humanities Commons, but perhaps the most important reason is that there is a need for this sort of group. While looking for a group to join in order to complete Challenge #2, did you discover that we are missing a group that you might like to join? For example, when I first joined Humanities Commons, I realized that nobody had built a group for all graduate students on the Commons, so I created one myself.
By creating a group, you provide other members interested in or connected to the group’s topic a space to connect and share work, opportunities, and ideas. While our groups share these similar benefits, there are three major different types of groups that you can create.
Using Groups for Different Purposes
On Humanities Commons, there are many different groups that serve many different purposes. While creating your own group, you’ll need to decide its type and purpose. Humanities Commons offers different levels of visibility for your group. Your selection of a visibility level for the group should be directly tied to your group’s purpose. Here are a few examples to get you started:
Public Group: Public groups are completely visible to everyone and anyone can join simply by clicking the “Join Group” button on the group’s page. Choosing this visibility is advisable for groups that are focused on scholarly disciplines and/or academic interests. Example Groups: Medical Humanities, Digital Humanists, Education and Pedagogy, LGBTQ Studies, etc.
Private Group: In private groups, users must request membership and be approved by a group admin or moderator in order to join the group. Private groups are still listed in the Humanities Commons group directory but their content and activity are visible only to accepted members. Choosing this visibility option is advisable if you’d like your activity to remain private while still allowing Humanities Commons users to see your group in the directory and request to join it. This setting might be especially good for working groups. Example Groups: 2016-17 Proseminar Fellows, Graduate Students, Connected Academics, etc.
Hidden Group: Under this visibility setting, your group will not be listed in the groups directory or any searches. Only users who receive an invitation can join and see the group content and activity. Choosing this visibility option is advisable if you want to keep your group and its content entirely private. This might work best for groups from a specific department or school who are not looking for any outside members.
Creating a New Humanities Commons Group: The Basics
In order to create a new group, first go to the Groups page by click on “Groups” in the left-hand menu below the Humanities Commons logo. Once you’re on the page, click the green “Create a Group” button near the top of the page.
This will take you to the form for new groups. You will be asked to input information regarding your group, including its title, privacy setting, and description. A few areas of the form are not required, including the group’s cover image and photo, as well as the group’s site. While these aspects are not needed, you might consider adding them in order to build your group’s appearance and presence online. Images help to make your group appear more inviting, active, and professional.
A group site can help to raise more awareness of your group and it can provide a secondary space for your group to discuss key issues. A site might be especially helpful for a private or hidden group because it can be a space to share your group’s work with the public. That being said, make sure that you are able and willing to maintain a group site before you build it!
Gaining Group Members
A newly created group always feels a bit lonely. You’ll want to get people to join your group quickly because this will lead to a more active group, which will, in turn, cause even more people to join.
Advertise on Social Media: Use your other social media accounts (ie: Twitter, Facebook, Reddit, etc.) to get the word out about your Humanities Commons group. Chances are you are already connected to other like-minded academics who may be interested in your group’s topic. Ask your members to also share the group on their social media accounts.
As you share your group on social media, consider what sort of posts gain traction on that specific social platform. For example, will adding images or hashtags to the post help it to both be noticed and spread? Should you highlight something specific about your group rather than just the group’s title?
Celebrate exciting discussions, new CORE deposits, events, etc. that occur within your group on social media. Your followers and friends will be encouraged to join your group by the wonderful work that is taking place.
Entice potential members by gamifying the situation. Offer fun and creative incentives, such as “The tenth person to join our group will get a personal shout out on Twitter” or creating a quick digital graphic celebrating group milestones, such as the gaining of a twenty-fifth member.
Advertise by Word of Mouth: Do you work with academics and educators who might be interested in joining this group? Tell them about it! Are you attending a conference which focuses on your group’s topic? Make a point to let fellow attendees know about your group while networking.
If your group is centered around a department at your university, school, or place of employment (ie: “Stony Brook University English Graduate Students”), you may also want to print out flyers advertising your group. Leave or post these in a common area, such as a break or copy room.
Encouraging Activity Within Your Group
Once you have group members, you need to make sure that your group is active. There are a number of different strategies you can take to help encourage participation within your group.
Low-Stakes Questions: This works just as well in online groups as it does in classrooms. If you post a low-stake question, members will feel more comfortable answering it, as it’s something that they feel confident in answering. These questions should not be the sort that would take someone a while to come up with an answer. They serve mainly to open up dialogue and allow your members to test the waters before really engaging in deeper conversations. Below are some examples.
Introductions: Briefly introduce yourself before asking other members to do the same. You can provide clear guidelines or even a list of information for these introductions to include, or you can let your members come up with what they might share. The introductions can include the member’s name, institution/workplace, designation, academic interests, current research, his or her reason(s) for joining the group, and/or a fun fact.
Goals: Ask members not only why they joined the group, but what they want to gain from being a member. In an ideal world, what will this group accomplish and/or provide? Their answers will not only help to spark dialogue and activity, but they may also give you new ideas about what to do with your group.
Recommended Reading/Viewing/Listening: Have you recently read a book or article that touches on topics important to your group’s focus? Or maybe you’ve watched a movie or listened to an album that does the same? Craft a recommendation post that not only encourages your members to check out your recent discovery, but welcomes them to share their own recent finds. Even if you don’t have anything in mind to recommend to the group, you can craft a simple discussion post that asks others to share the things they’ve recently discovered and loved.
Victories: Start a discussion by asking members to share a recent professional or personal victories. You might want to make this a weekly or monthly tradition if it goes over well with your members. Sharing victories will not only inspire good feelings in your group members, but this activity can also potentially become a treasure trove a good ideas and best practices. For example, members may share a lesson plan or classroom activity that worked really well with their students.
Group Traditions: Creating weekly, monthly, or even annual traditions on your group can give your members even more of a reason to keep up to date with your group. They can also help to create a group culture of community and support. These traditions can take place in a discussion topic thread that you start.
Victories: Ask group members to share their victories of the week/month/year. These victories can be big or small, personal or professional. What matters is that they matter enough for your group members to want to share. Sharing victories will not only inspire good feelings in your group members and dialogue in your group, but this activity can also potentially become a treasure trove a good ideas and best practices. For example, members may share a lesson plan or classroom activity that worked really well with their students.
Check-Ins: Have group members share something that they are celebrating or something that they have learned or discovered that week/month/year.
Celebrations: Highlight and celebrate the work shared by your members on CORE and other areas of the Commons. When group members deposit their work in CORE and share it with your group, make a point to shout out their contribution on your group’s discussion page. A simple comment reminding other members to check out the new deposit and thanking that member for sharing it could help to encourage further participation. For example, members may begin shouting out each other or sharing their other work (ie: blogs, digital projects, etc).
Group Events: The “Discussion” option in HC groups can allow people from across the globe to connect and ‘hang out.’ Take advantage of these affordances by scheduling times for digital group events. Remember to use the group’s calendar once your event is scheduled!
Book Clubs: Select a book/article/movie/etc. pertinent to your group. It might be easier to start with something small like an article. Rather than choosing the text yourself, you may also want to create a poll and/or ask your members what they’d like to examine. You might also want to choose articles uploaded and written by group members. Once you’ve decided on a text, encourage your members to read the text by a certain date. On the scheduled date and time, you and your group members can meet in the discussion group to chat about the text. Book club meet-ups can become a monthly tradition for your group. After the meeting, you or another group member can post a summary of the discussion.
Topic Meets: Choose a topic or question pertinent to your group. Schedule a time for group members to meet online to discuss the issue.
Expert Meets: If you find out that a member of your group has a recent accomplishment (ie: a great lesson plan, a published book, completion of a digital project, etc.), ask them if they would be willing to discuss it with the group. Schedule a time and date for the group to meet digitally. Encourage the “expert” to have a short 10-15 minute presentation of their accomplishment and for group members to arrive to the digital meet-up with questions for the presenter.
Share Your Completed Challenge
Of course, most of the steps described in the blog post will not be completed in a week. This is something that you will continue to build and maintain beyond the scope of this summer camp.
That being said, we would love to see your new groups! Share your new group with the HC Summer Camp by using the discussion thread designated for this mini-challenge. If you’re on Twitter, please share your group using the #HCSummerCamper hashtag. This is a great way to get new members, so you might also want to include a brief description of your group’s focus. Check out (and join) other campers’ groups as you complete this advanced challenge.
If you have any questions or if you run into any issues as you complete our second mini challenge, fear not! Your camp director is here to help. Reach out to the Humanities Commons Summer Camp through any of the following contacts:
Humanities Commons: Post your question/concern as a new discussion thread in our HC Group.
Interested in completing an extra challenge this week?
For each of our biweekly challenges, we will also include a bonus advanced challenge.
The first extra challenge is to create an ORCID digital identifier for yourself and add it to your Humanities Commons profile.
Why would I want to have an ORCID identifier? What does it do?
ORCID is a not-for-profit organization that allows researchers to create a personal, persistent identifier to connect their work online. By having an ORCID account, you and your professional activities online will be connected, allowing you to receive credit for your work. This is especially helpful if you have a common name (your ORCID can distinguish your work from work by other people who happen to share your name) or if you have ever changed your name (your ORCID can link work you created under different names). And, increasingly, publishers and grantors ask or require authors to use ORCID IDs.
Going forward, Humanities Commons hopes to offer even more integration with ORCID. It would be a good idea to get connected through ORCID now so that you can reap these future benefits on Humanities Commons.
How do I create an ORCID ID?
All you have to do is go to ORCID’s website, where you will find clear instructions on how to create an ORCID ID and profile. Not only is it simple to create, but signing up for an ORCID is completely free!
If you have publications, you can list them manually or import works from a number of sources, including MLA Bibliography, DataCite (anything deposited in CORE should be found there), Crossref (another prominent minter of DOIs), or BASE (work in CORE should also be found there).
Once you’ve created an ORCID ID, you can include it on your Humanities Commons profile by copying and pasting it into the ORCID field, located in the social media section of the editing form.
Here is a screen shot of where the ORCID ID section is located on the editing form.
If you are a member of MLA, you can add your ORCID ID to your MLA.org member information, and it should automatically sync to your Commons profile.
…And that’s it! If you have any questions or if you run into any issues as you complete this challenge, fear not! Your camp director is here to help. Reach out to the Humanities Commons Summer Camp through any of the following contacts:
Humanities Commons: Post your question/concern as a new discussion thread in our HC Group.