This summer, Humanities Commons will honor one of the most time-honored traditions of the season: summer camp.
That’s right- we’re hosting our very own virtual summer camp for users old and new. The HC Summer Camp will be particularly helpful to anyone who has wanted to take advantage of our platform, but either hasn’t found the time or isn’t sure where to begin. HC Summer Camp will give you deadlines and guidance to help you achieve your ideal digital presence.
“Campers” will be encouraged to complete a challenge every other week. For example, our first challenge will be focused on the Humanities Commons profile page. To complete Challenge #1, campers will either create a Humanities Commons profile or improve and update their pre-existing HC profile. Please see the bottom of this post to see our schedule and challenges.
During the two weeks leading up to each challenge’s deadline, you will be able to find instruction and guidance here on the HC team blog. We will also track and celebrate the work our campers are doing on Twitter as well as the blog. We hope that you will not only enjoy the prestige of being a star camper, but that you will find inspiration from the exemplary work of others.
Please check out our schedule and challenges located under the “Schedule” tab.
Successful campers will enter the Fall semester with an impressive profile, personal site, a larger readership, new networking connections and a supportive academic community.
Interested in becoming a camper this year? Join our HC group so you can receive updates, inspiration, and more once our camp opens for the summer.
Please let us (and the world) know that you’re going to attend the Humanities Commons Summer Camp this year by commenting on this blog post and on whatever social media platforms you use. Please make sure to use our hashtag #HCSummerCamper!
Thank you for participating in the first ever Humanities Commons Summer Camp! No matter your level of engagement with the summer camp, we want to hear from you. By answering the questions below, you can help us to develop future programs like the summer camp to better help our users take advantage of HC and strengthen their digital presence.
The survey is short and should not take more than 5-10 minutes of your time. You can choose to provide your email address at the very end to enter to win your very own Humanities Commons platypus! You have until Wednesday, 8/29 to complete the survey. Winners will be announced on Thursday, 8/30. Otherwise, the survey is completely anonymous.
This platypus is looking for a new home!
Thanks again for your help and participation- we really appreciate it.
Welcome to your sixth and final challenge. Congratulations- you’ve made it to the end!
The Challenge
For this challenge, I want you to take time to look back at all that you’ve built this summer. You should be proud of all you’ve accomplished! I also want to challenge you to make a plan for the future: how can you realistically continue the momentum you’ve created this summer to ensure that you persist in maintaining and growing your digital presence?
To complete this challenge, you must add a response to our Challenge #6 discussion thread answering some of all of the following questions:
What are you most proud/happy/excited about learning/creating during the HC Summer Camp?
Are there any questions you still have regarding anything that we’ve learned this summer?
How do you plan to continue maintaining and building your digital presence? Which platforms will you update and how often? How will you remember to update them? Make sure that the goals you set are realistic and compatible with your other responsibilities.
Do you have any feedback for myself and the HC team regarding either the HC Summer Camp or HC in general? Is there any way that we can improve? If we were to host another summer camp next year, what would be helpful topics to cover? Is there anything about the HC Summer Camp that you would change or improve? Is there anything that you would like to keep the same?
Is there anything else you’d like to share?
If you’d prefer to share any or all of your responses to the above questions privately, please send them to me either via a private message on Humanities Commons or through my email, CDuffy@mla.org.
Beyond Summer Camp
Thank you again for participating in all of our challenges this summer. The active discussion and community support that you provided is what made this summer camp a success.
If you ever want to check back on our discussions or on any of the challenge blog posts in the future, you will be able to do so: both the site and group will remain online.
Finally, if anyone is interested either in sharing your thoughts on your #HCSummerCamper experience or if you’d like to discuss a project you’ve built on Humanities Commons, I’d love to speak with you! I’m currently seeking HC users to interview for the HC Team Blog. If interested, please send me an email and let me know what you’d like us to discuss.
Final Thoughts
If you’re on Twitter, please share your super-camper status using our #HCSummerCamper hashtag. You should also consider sharing the many things you’ve created and learned throughout our six challenges on social media!
I look forward to hearing your responses to our final reflection and planning challenge.
If you have any questions or if you run into any issues, fear not! Your camp director is here to help. Reach out to the Humanities Commons Summer Camp through any of the following contacts:
Humanities Commons: Post your question/concern as a new discussion thread in our HC Group.
Adding content to your site may take some time and thought. With this in mind, I wanted to assign you a shorter mini-challenge to compliment our fifth challenge.
To complete this mini-challenge, you will need to explore a few of the widgets that Humanities Commons sites offer. As a reminder, HC sites are WordPress sites, so if you have any questions, general resources related to WordPress sites would probably be a helpful place to start.
What are widgets?
WordPress widgets are tools that help you to add features and content to your sidebars. Most of them require no work beyond activation, however, for some widgets, you may be asked to include your own text or images.
Examples
There are a number of different widgets for you to choose to include in your Humanities Commons site. Additionally, the widgets available to you depend upon the theme your site uses. Here are a few that may be of interest…
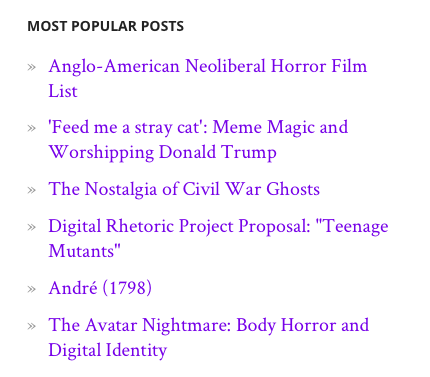
Most Popular Posts: This widget will maintain a list with links to your most popular posts. “Popularity” here is based on the number of visits each of your posts receives. Ten is the automatic number of posts listed, however, if you’d prefer a different number, this is customizable. Just like plug-ins, certain widgets may work better with one site genre than another. For example, this widget can work really well for a blog site, but may not make sense on course site.
How this widget appears on my site
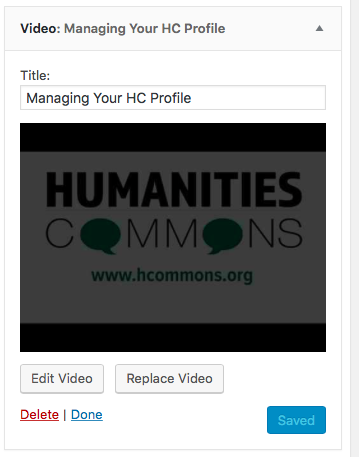
Video or Audio: By using either of these widgets, you can include a video or audio file onto your page.
How this widget appears on my site
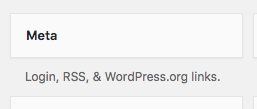
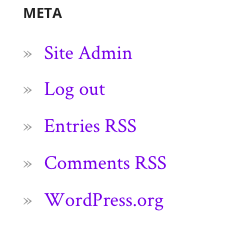
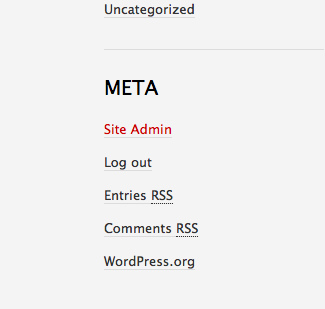
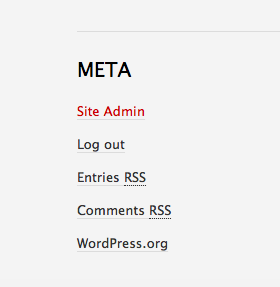
Meta: If the theme of your site does not include a “Meta” menu on its homepage, it might make your life easier to add this widget to your site. The meta menu will include a direct link to your dashboard, a link to log-out, RSS code for comments and entries on your site, as well as a link to the WordPress homepage.
How this widget appears on my site
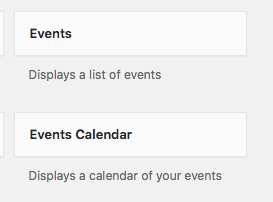
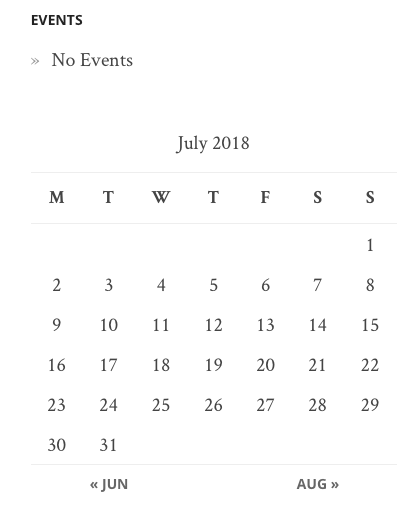
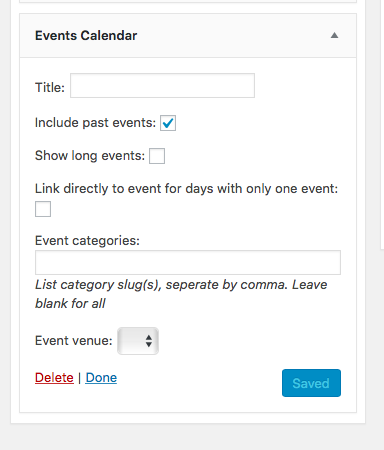
Events or Events Calendar: These widgets will keep a running list or calendar of the events you’ve scheduled. This is a great tool to use for sites that are dedicated to workshops, conferences, or communities, because they serve as reminders of your upcoming events.
How this widget appears on my site (I don’t have any events listed)
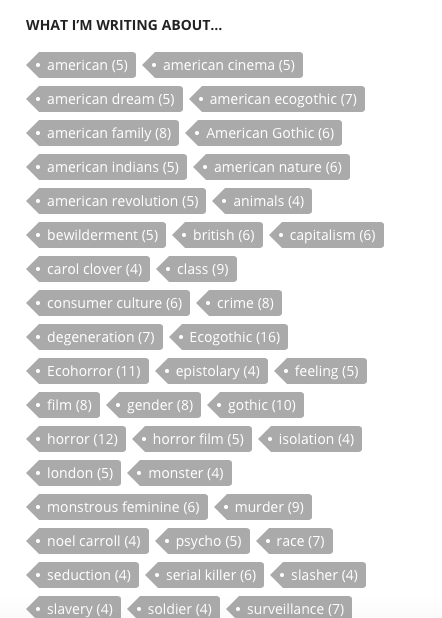
Tag Cloud: This widget creates a visual cloud of the various tags you’ve attached to your posts and pages. You can customize this widget by creating your own title for the image and choosing whether or not you’d like to show tag counts.
How this widget appears on my site.
How do I activate widgets?
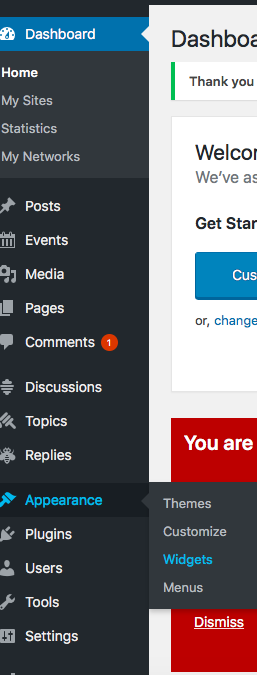
To select and activate widgets for your site, first go to your site’s dashboard. After hovering your pointer over “Appearance” on the left-hand menu, select “Widgets.”
Select “Widgets” from the left-hand menu
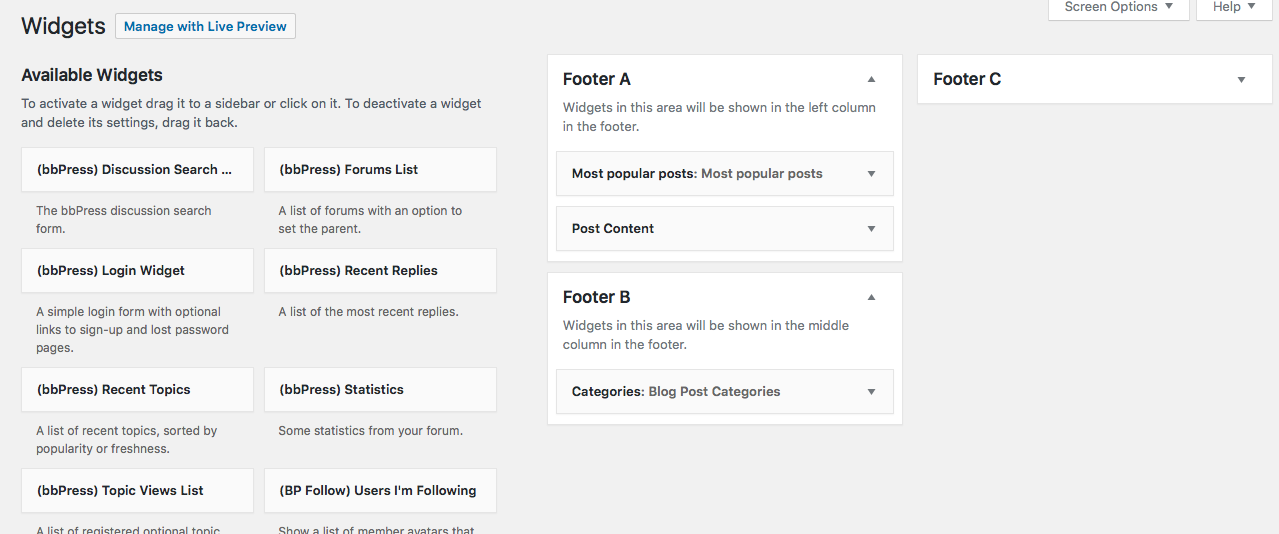
This will take you to a list of the widgets that are available for Humanities Commons sites to use. Read through the different widget options as there may be some that work for you that I didn’t cover in my brief list of example widgets.
The widgets page
Once you’ve found a widget that you would like to include on your site, click it and drag it to your desired footer (located on the right of the page). The available footers and their locations will be different depending on which theme your site uses. Note that you can include multiple widgets in a single footer. If your selected widget contains customization options or requires you to add information, you will need to fill this out after you’ve placed the widget in the appropriate footer. Don’t forget to click the save button once you’ve finished customizing!
The video widget is one example of a widget that requires customizationThe events calendar widget is another example of a widget that requires customization
To see how your widgets look, visit your site. The widgets will typically appear on every page of your site. If you don’t like what you see, or if you want to change things around, remember that you can always return to the widgets page and edit your work.
Share and Reflect
Please share any discoveries or questions that emerged as a result of exploring the available WordPress widgets on our group page, especially if you found a widget not discussed in this blog post!
If run into any issues as you complete this challenge, fear not! Your camp director is here to help. Reach out to the Humanities Commons Summer Camp through any of the following contacts:
Humanities Commons: Post your question/concern as a new discussion thread in our HC Group.
Welcome to your fifth challenge! We’re focusing on sites for a little bit longer.
To complete this challenge, you will need to add content to your site.
Tips
Because of the nature of this challenge, there are no specific guidelines that I can provide to you. You should feel free to add whatever content you think is best suited to your site. However, I do have a few tips to help make this process as stress-free as possible…
Focus on the genre! In our last challenge, you decided on a genre for your site. Consider what type of content best suits the purpose of your site.
Pace yourself! Most likely, you aren’t going to be able to include all of the content you want to add in these two weeks. Ideally, the site will become something that you continue to grow beyond this summer. That being said, don’t feel like you need to add a ton of content to the site right now. Instead, try to decide what you might want to add in order to make it presentable to potential visitors. What are some important details and information that you’d like to include? For example, I’m creating a site for a course that I will be teaching in the fall. Because it’s my first time teaching this class, I don’t expect (nor would I want) to quickly come up with an entire syllabus in two weeks. However, I do think that I can post a mini-blurb about the class, and a few reading excerpts that I know I want to teach.
Plan for the future!This tip is related to the last. You should reflect on how often you expect to update your site in the future. Whatever plan you make will likely also depend upon the genre of your site. In order to better insure that you will succeed in your expectations, you might want to make a rough plan for a schedule or frequency of updates/posts. This will help you to continue managing your site into the future.
Find inspiration!Not sure what to add to your site? Review some of the exemplary sites we shared for Challenge #4 or check out some of the sites being created by your fellow campers for inspiration. For example, as a result of looking through others’ sites, I decided that I’d like to add a page on my teaching experience to my personal site. This is something I might not have considered had I not looked at these other great examples.
Feel free to change!As you add content, you may notice that the theme of your site doesn’t seem to fit anymore. You can change your site’s theme (as well as its colors, header image, menu, etc.) as much as you want.
Share your completed challenge
Once you’ve completed this challenge, share a link to your site with the group, we want to see your brilliant creations! Tell the group about your challenges and discoveries, as well as your plans for your site.
If you’re on Twitter, please share that you’ve completed the fifth challenge using our #HCSummerCamper hashtag. You should also share your site on social media, especially now that it has content!
I look forward to hearing your experiences and checking out your sites!
If you have any questions or if you run into any issues as you complete this challenge, fear not! Your camp director is here to help. Reach out to the Humanities Commons Summer Camp through any of the following contacts:
Humanities Commons: Post your question/concern as a new discussion thread in our HC Group.
To complete our fourth mini-challenge, you will need to explore a few of the plug-ins that Humanities Commons sites offer. HC sites are WordPress sites, so if you have any questions, general resources related to creating WordPress sites would probably be a helpful place to start. It is important to know that there are some limitations in terms of themes and plugins that HC can offer because of the complexity of the multinetwork system on which HC is based. In other words, not all plugins (or themes) under the sun can be utilized, however, there are quite a few that may be of interest…
How do I install plug-ins to my Humanities Commons site? How do I know what my options are?
To find the plug-in page, you must first get to your site’s dashboard. To do this, you can either append “/wp-admin” to your site’s url or click on “Site Admin” located on the “Meta” menu (this menu appears in different places depending on the theme your site is using, but it should be somewhere on your homepage).
Choose “Site Admin” to go to your site’s dashboard.
Once on your site’s dashboard, you can select “Plug-Ins” from the left-hand menu to take you to the plug-in page.
Choose “Plug-Ins” from the left-hand dashboard menu.
On the plug-in page, you will see a list of all twenty-six plug-ins currently available. To install any of these plug-ins, simply click the “Activate” link attached to the specific plug-in you desire.
The plug-ins pageOne way to activate a plug-in for your site is to click the “Activate” link attached to your desired plug-in.
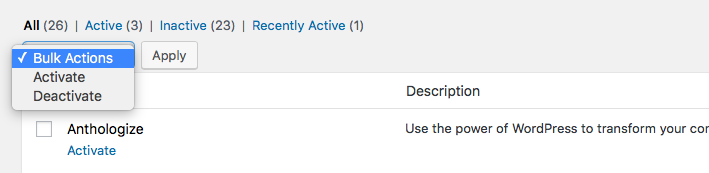
You can also use the “bulk actions” menu to activate multiple plug-ins at once.
To activate multiple plug-ins at once, use the “Bulk Options” drop-down menu
Because describing each and every one of these plug-ins would result in a blog-post longer than anybody wants to read, I’m going to highlight four of my favorites. If you want to learn about the plug-ins that I don’t cover in this blog-post, explore the different options on your own and let us know what you’ve found by posting a discussion thread on the HC Summer Camp group page. You can also feel free to ask questions about any of the plug-ins on our group page, Twitter, or via email. You can find our contact information at the very bottom of this page.
Featured Plug-In #1: Commentpress
Listed as “Commentpress Core” on the plug-in menu, this is a powerful plug-in that allows readers to comment on the work published on the site. This plug-in works particularly well if you want to invite feedback onworks-in-progress, or encourage discussion on more finished work. Commentpress is unique from the other plug-ins in that it functions as both a plug-in as well as a theme. This means that upon installation, Commentpress will completely change the look of your site to match the Commentpress theme. Only activate this plug-in if you want your site to take on the “Commentpress look!”
If you’re curious to see what Commentpress-enabled sites look like, below are a few great examples:
By activating the Commentpress plug-in, visitors to your site will be able to comment on posts at the paragraph-level. Because of this power, the Commentpress plug-in is probably most useful for project and course sites.
If you have an article, seminar paper, dissertation, etc. that is a work in progress, using the Commentpress plug-in is a great way to crowdsource feedback. I’ve also seen this plug-in effectively used for conference panel sites that share the abstracts and/or conference papers of the speakers. Finally, I can imagine this being an effective tool to use on a class website. If your students are comfortable sharing their work publically, this could be a great way for them to receive feedback on their work from each other as well as from Humanities Commons members.
Featured Plug-In #2: GoogleDoc Embedder
The GoogleDoc Embedder allows you to embed documents (including, but not limited to, PDFs, MS Office, and ZIP files) seamlessly on your site using the Google Docs viewer. This is a great way to include your CV, syllabi, publications, and more, directly onto your site. You have the additional option of allowing visitors to download the files from your site’s page or not.
Using the GoogleDoc Embedder is super easy. After you’ve activated the plug-in, you should see a Google icon above your text box whenever you create or edit a post or page.
The GoogleDoc Embedder icon should appear while editing posts and pages.
Here are some examples of the GoogleDoc Embedder in action:
The WP-Polls plug-in allows you to embed polls into your posts. Visitors of your site can respond to your poll (you can customize your polls so that only registered users, only guests, or both can vote) and you are able to immediately view the results.
In order to create an embed a poll, after the plug-in is activated, go to your site’s dashboard, hover your pointer over “Polls” at the bottom of the left-hand menu, and select “Add Poll.”
Choose “Add Poll” to create a new poll for your site.
You will be taken to the new poll form. Once you’ve filled out the form, click the blue “Add Poll” button at the bottom of the page. You will be given a Poll ID code, which you should copy and paste into the page or post in which you’d like the poll to appear.
You will be given a shortcode for your poll.Copy and paste the provided short-code into the post or page.
Although I haven’t used this plug-in yet, I’m really excited to use it in my course site. I think this could be a great way to survey my students to get a better understanding of their experiences and interests. I may also use these polls as a way to quickly test for understanding.
I wasn’t able to find any examples on other HC sites of the polls plug-in, but here is my test poll (feel free to vote if you want 🙂 ).
Featured Plug-In #4: Zotpress
The Zotpress plug-in is a great way to cite sources accurately and quickly on your site. It works by connecting your site to your Zotero account. If you don’t have a Zotero account or don’t know what Zotero is, I highly recommend that you check it out! Because it helps with citation, the Zotpress plug-in is probably best used for blog sites or sites publishing work.
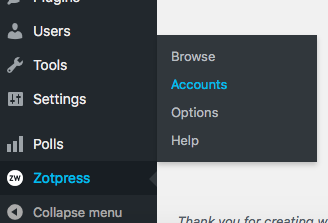
In order to use Zotpress, once it’s activated, go to your site’s dashboard, hover your pointer over “Zotpress” at the bottom of the left-hand menu, and select “Accounts.”
First choose “Accounts” to get your Zotpress plug-in started.
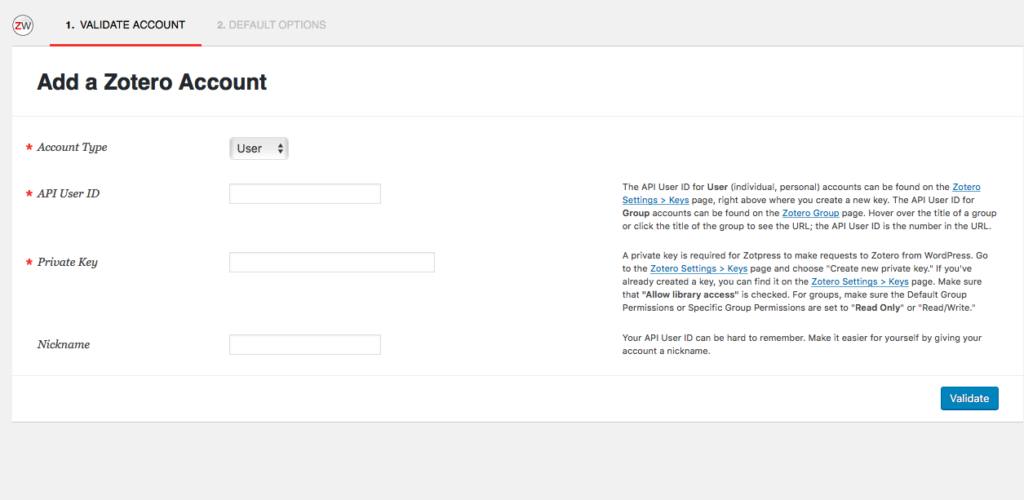
Once on the Zotpress page, click on the “Add Account” button on the right of the screen to sync your Zotero account to your site.
Choose “Add Account” located at the top right of the screen.Provide the needed information so that your Zotero account is synced.
Once this is complete, you will be able to easily include citations (both in-text and bibliographies) on your posts using the Zotero tool which should now appear whenever you are editing or creating a post or page.
The Zotpress tool should now appear whenever you create a new page or post.
Share and Reflect
Please share any discoveries or questions that emerged as a result of exploring the available WordPress plug-ins on our group page, especially if you fell in love with a plug-in not discussed in this blog post!
If you have any questions or if you run into any issues as you complete this challenge, fear not! Your camp director is here to help. Reach out to the Humanities Commons Summer Camp through any of the following contacts:
Humanities Commons: Post your question/concern as a new discussion thread in our HC Group.
Welcome to your fourth challenge! Can you believe we’ve already come so far? This summer is going by quickly!
Our fourth challenge is all about Humanities Commons sites. In order to accomplish this challenge, you will need to create your own site on Humanities Commons. Since building a site is a pretty tall order, I’ve divided the full work of creating a site between this challenge and Challenge #5. For now, all you need to do is build the site and design its look. In the next challenge, you will add, or at least begin to add, the content.
So, for Challenge #4, you will need to:
Decide what type of site you want to build.
Create and claim your site’s domain.
Design your new site’s appearance.
If you already have a Humanities Commons site, you can still participate! You can either create a new HC site (there is no limit to how many you can make) or take the time to spruce up your extant HC site.
What type of site should you build?
I was really surprised when I discovered the many different possible types of Humanities Commons sites. HC users have been really creative in their ability to design their HC sites to fit their present needs. Below, I’ve included a list of different types of HC sites I’ve come across along with a few examples of each. This, however, is nowhere near an exhaustive list. Basically, if you can dream it, you can build it. In deciding which type of site would best suit you at this present moment, consider what you’d like the site to accomplish. Are you currently working on a task that a website would make easier? Do you have a project, document, or event that you’d like to share with a broader audience? Would your upcoming course benefit from the addition of a digital meeting-space?
Non-Exhaustive List of HC Site Genres
Blog A blog can provide a space for you to keep track of your reading, work out future article or book ideas, keep track of an idea or a subject of interest over time, reflect on your teaching, and so much more. The benefits of a blog not only rest in their function as a journal, but they can also provide visitors with a greater sense of your passions and interests as an academic and/or educator. Since HC sites are connected to your HC profile, your professional information will be tied directly to the thoughts you post on your blog.
Personally, I am currently using my blog as a space for my comprehensive exam notes. This method enables me to tag each entry which is already helping me to make connections that I otherwise might have missed.
I also recently noticed that HC sites are incredibly discoverable through my blog. After posting my notes for the 1824 American play, “Superstition, or the Fanatic Father,” I Googled the play’s title to see what I could find. To my delight, I found that my blog post came up as the second (!) search result, just under its Wikipedia page. Following this discovery, I received an email from a scholar whose work I greatly admire. She had found my blog (including my post about one of her articles) through a Google search and asked me to contribute a review to an upcoming journal issue she is editing. Who knew a blog would provide so many benefits!?
Personal Site You might want to create a personal site if you have more information and media that you’d like to share, but that doesn’t fit on your HC profile page. Users have created personal sites that include links to their publications, video and audio files of interviews and podcasts on which they were featured, and PDFs of syllabi, among others. You will notice that many of the personal sites on this list and the blogs from the list above include a mix of features from both genres. This is a great way to ensure that your blog is a part of your professional image.
Digital Journal So far, I’ve only come across one digital journal (The Sheffield Gender History Journal) on Humanities Commons, however, it seems really successful. This digital journal provides a space for graduate students and professors from the University of Sheffield to publish short articles for the public to access, as well as to build a sense of community across disciplines within their university.
Course Site If you’re teaching a course in the future, you may want to consider building a site for your course. Users who have created course sites on Humanities Commons have used it as a space for the syllabus, worksheets, and readings to be located. Because anyone with a WordPress account can comment on HC sites, it is also easy to have students comment and respond to posts on your course site. To learn more about how the American literature course site listed below was used, check out my interview with the site’s creator.
Event Site Are you chairing a panel or organizing a scholarly event in the future? You can make a site for that! HC sites not only can help you to advertise your upcoming event, but it also can help you to archive the event afterwards. Users have used these sites to post CFPs for conferences, to share abstracts for panels, and to archive conference papers. Users have also used HC sites when hosting virtual and in-person workshops so that vital information, tools, and lessons can be posted for all workshop attendees and non-attendees to see, both during and after the workshop. This is a great way to make the discussions and ideas shared at your event accessible to more people.
(Yes, I did include this site as an example below!)
Digital Project Site If you are working on or completed a digital project, HC sites are a great place to house it. Again, because HC sites are directly connected to your HC profile, this allows your digital work to become a more visible part of your professional identity. HC sites are also great to use for digital projects because multiple users can ‘own’ and work on it. HC sites allows for the use of a number of different plug-ins (we will cover these in our upcoming mini-challenge). The commentpress theme+plugin allows visitors of your site to comment at the paragraph level on a work in progress.
Digital Anthology If you teach or study literature that is old enough to be considered free-use, creating a digital anthology is a great option. One of the anthologies below was used in a course on early American literature in lieu of a traditional textbook. By creating an anthology for your class on a HC site, you free your students from the burden of paying for and carrying around a bulky printed anthology.
Claiming a Domain and Establishing Your Site on Humanities Commons
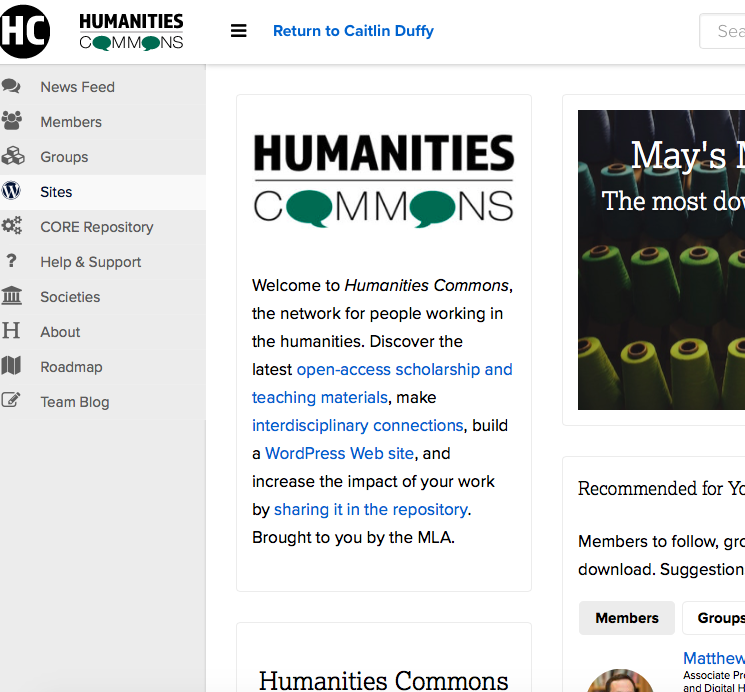
To create a Humanities Commons site, first click the “Sites” tab located on the left-hand menu below the HC logo.
Click the “Sites” option from the left-hand menu
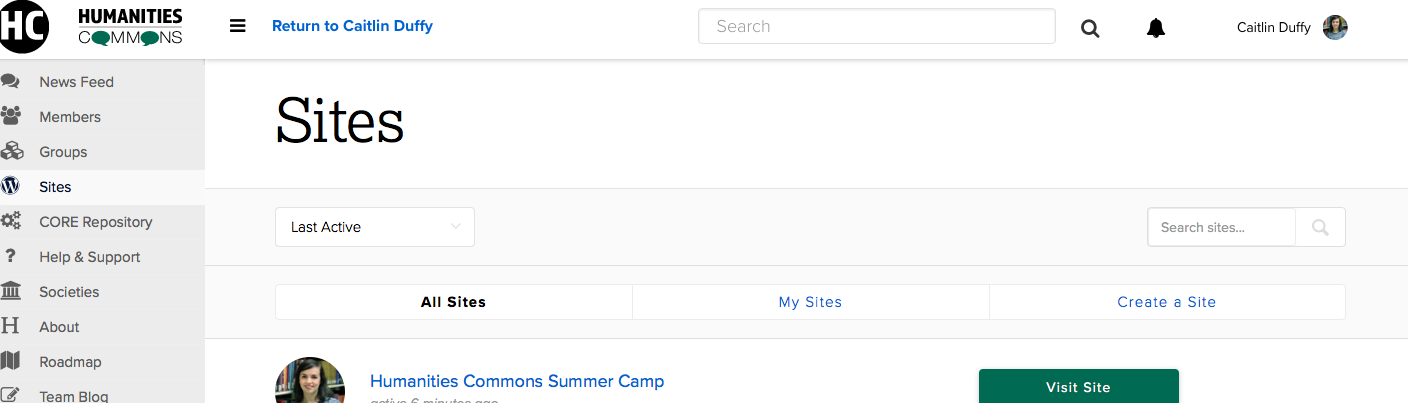
Once on the Sites page, select the “Create a Site” link on the top right of the screen.
Choose “Create A Site.”
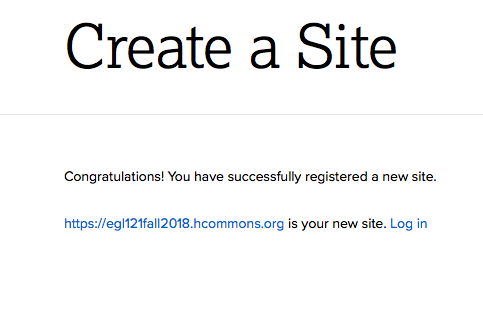
This should take you to a form which you must fill out in order to create your site. The very first section of this form asks you to create your site’s domain.
The “Create a Site” form
Designing Your Site’s Appearance
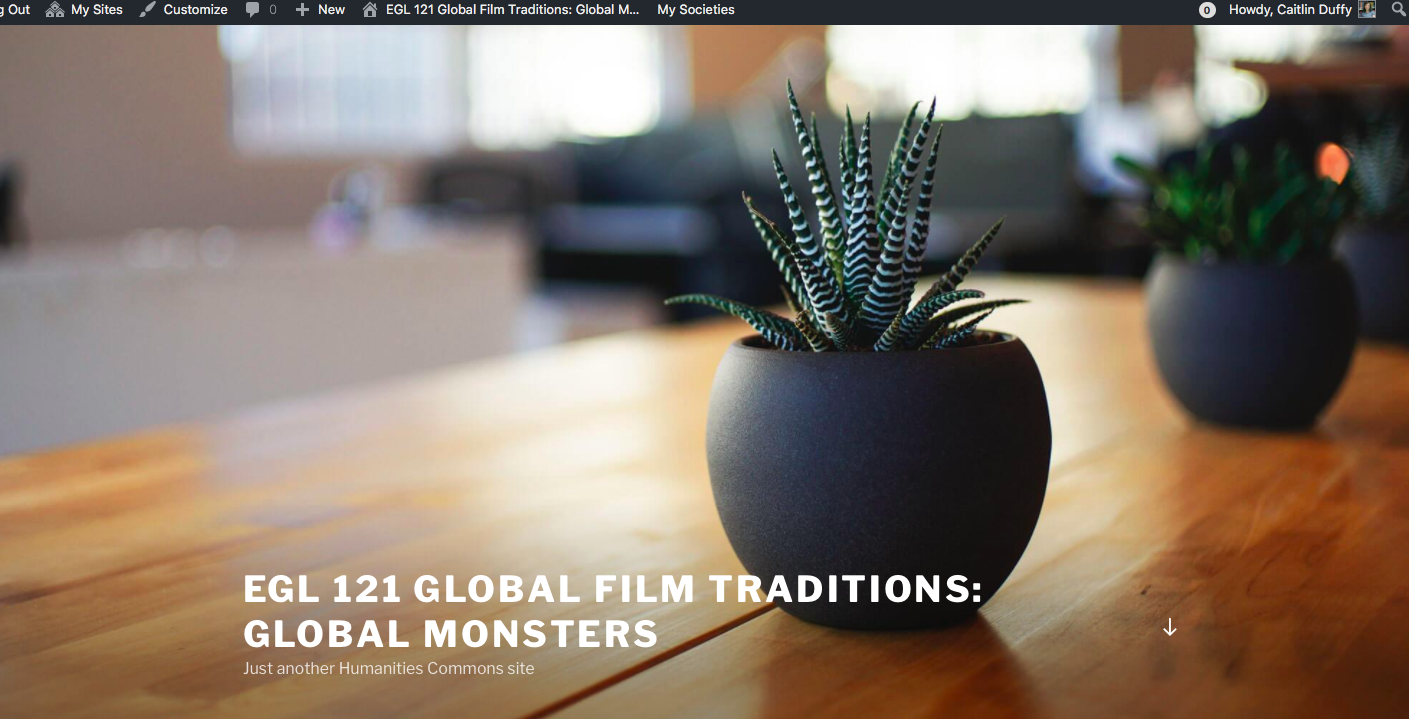
Once you’ve finished claiming a domain and establishing your site, you will be presented with a link to your site. Click on the link to get started.
Click on your site’s link.
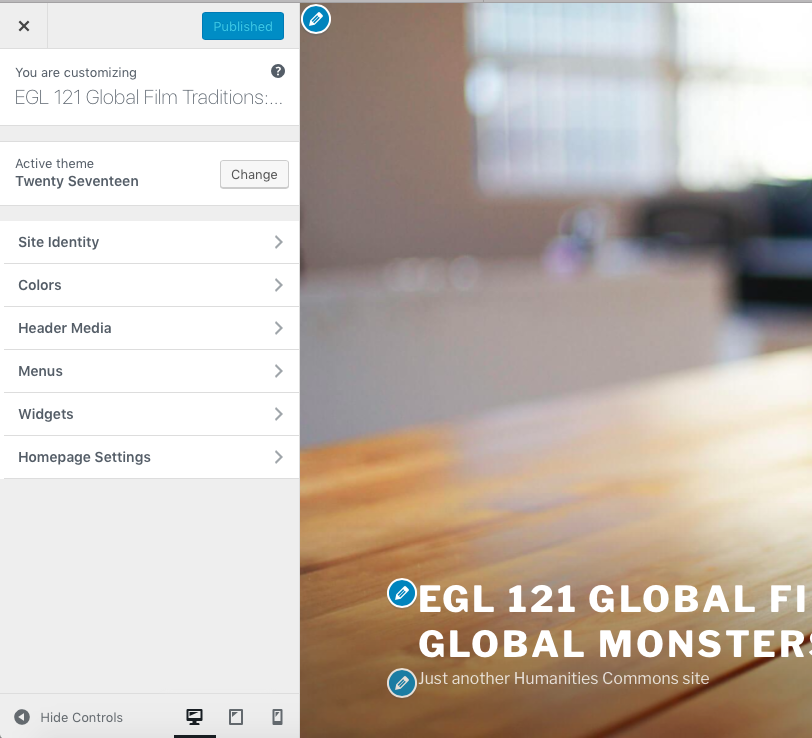
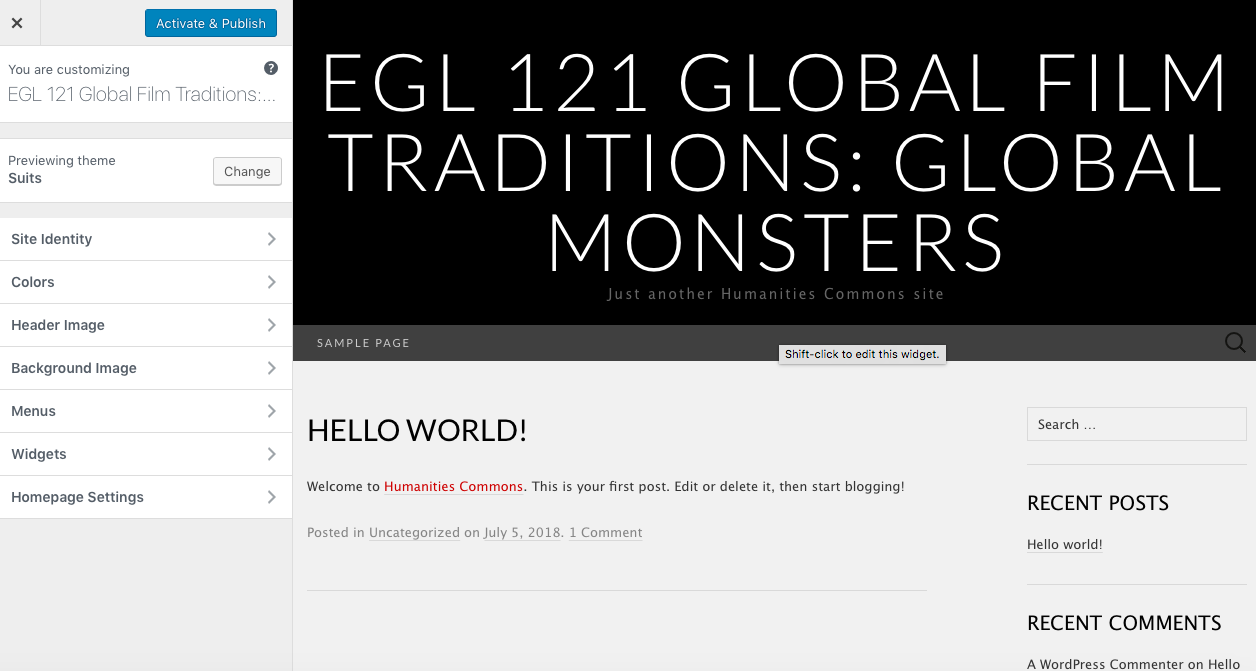
Click “Customize” on the top left of your site’s homepage to begin designing your site’s look.
Click on “Customize”The customization menu
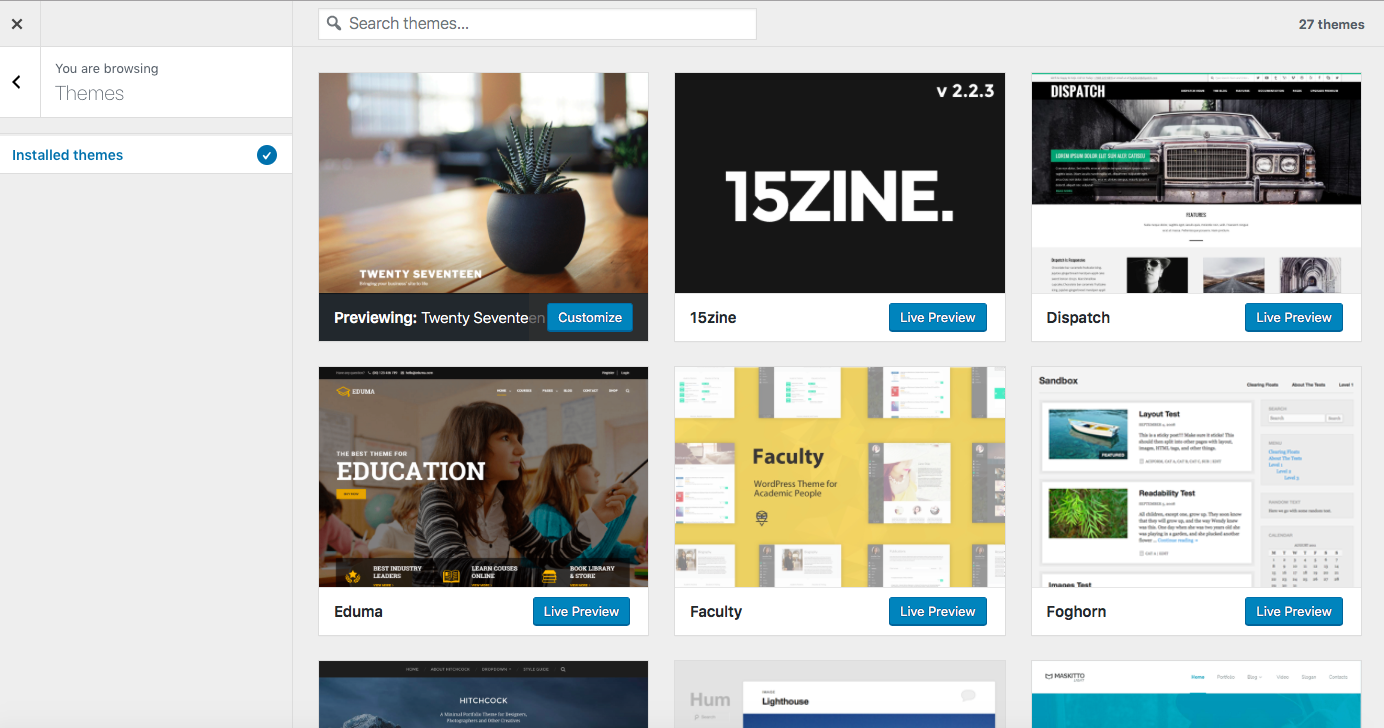
The first thing you should do is decide on your site’s theme. Click the “Change” button on the customization menu. This will allow you to see all twenty-seven themes that you can choose from. I recommend trying out a bunch of different themes before deciding on one.
The various theme options on HC sites
To decide on a theme for your site, click the “Live Preview” button next to the theme of your choice. This will give you the opportunity to view your site using this theme. It will also let you see the different options that each theme gives you. For example, some themes have a banner image, while others don’t. In deciding which theme works best for your site, consider your site’s purpose. How will its information be best organized? Who is the target audience for your site? Which theme works best to deliver information to this group? Should the site be more visual or more textual?
A theme preview
Once you’ve chosen a theme, make sure to click the “Publish” button at the top of the customization menu. This will save your changes and make them live for any visitors of your site. After that, go through the other customization options to further manage your site’s appearance. After any changes, make sure you hit “Publish” so that your work is saved.
To leave the customization window, click the “X” on the top left of the customization menu. This will bring you back to the normal view of your site. If you want to create multiple pages and a menu for your site, you will need to find the “Site Admin” link. This should be somewhere on your site’s homepage, usually on the right-hand side near the bottom. By clicking that, you will be taken to the administration page for your site.
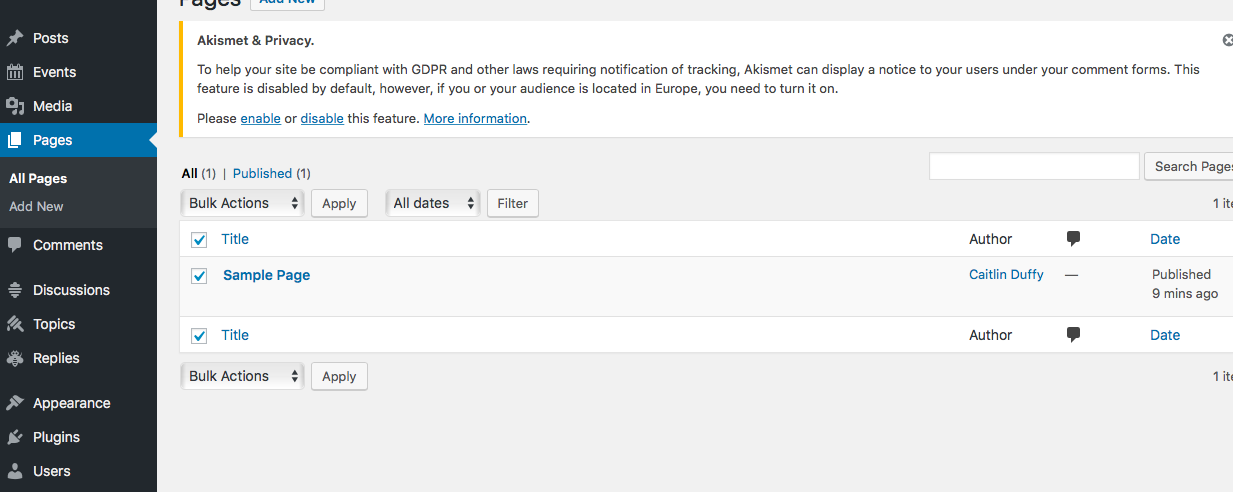
Choose “Site Admin” to continue working on your site’s look
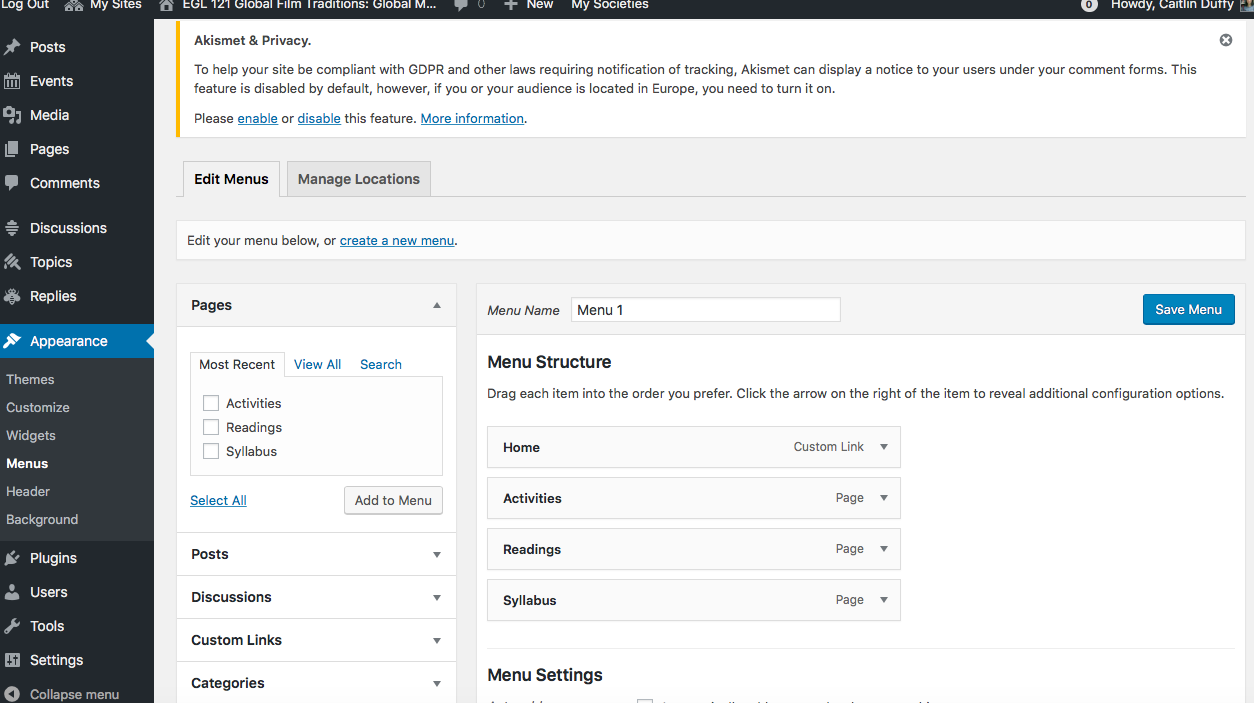
Once there, click the “Pages” link on the left-hand menu, then click the “Add New” button at the top of the pages page. For now, just write the title of your page in the text box marked “Title,” then click “Publish.” Keep repeating these steps as many times as you need until you have all the pages you’d like for your site. For the course site I’m creating for this challenge, I built three pages: “Home,” “Readings,” and “Syllabus,” while my personal site has five: “Home,” “Blog,” “Conferences,” “Publications,” and “Contact.” Consider how best to organize your site based on the type of site you’re building, your audience, and personal preference.
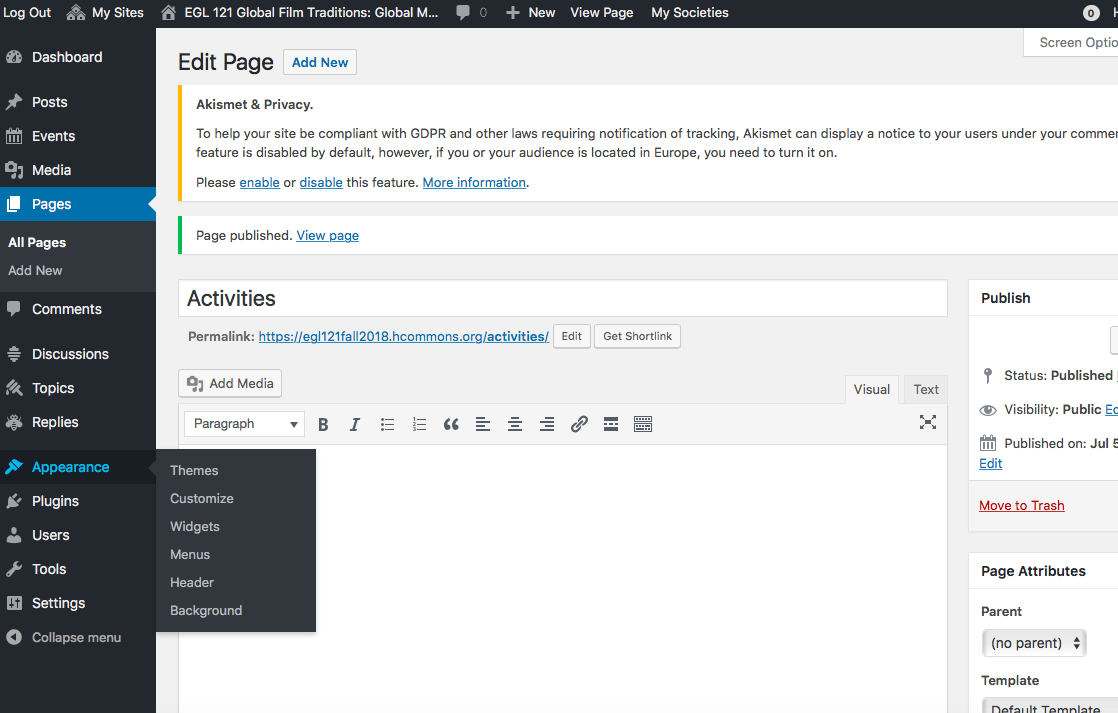
Once you’ve created some pages, hover your pointer over the “Appearance” tab on the left-hand menu and select “Menus” from the options that appear. On the Menus page, you can select which pages you’d like to include on your site’s menu, as well as the order in which they appear. Once you’re satisfied with your menu, click “Save Menu.”
Choose “Menus” from the Appearance menuSelect the pages you’d like to include on your menuMy menu now appears just below my site’s header
Of course, there is a lot more you can do to make your site look perfect- I’m sure you noticed how many buttons and menus there are on the customization and administration pages! For this post, I just wanted to highlight a few basic actions you can take to make your site look clean, professional, and organized. Feel free to play around and explore the many other tools and options available to you. If you discover anything really neat, please share it with the group!
Share your completed challenge
Once you’ve completed this challenge, share a link to your site with the group, we want to see your brilliant creations! Tell the group about your challenges and discoveries, as well as your plans for your newly created (or recently updated) site.
If you’re on Twitter, please share that you’ve completed the fourth challenge using our #HCSummerCamper hashtag. You should also share your site on social media!
I look forward to hearing your experiences and checking out your new sites!
If you have any questions or if you run into any issues as you complete this challenge, fear not! Your camp director is here to help. Reach out to the Humanities Commons Summer Camp through any of the following contacts:
Humanities Commons: Post your question/concern as a new discussion thread in our HC Group.
For our third mini-challenge, I want to introduce you to a really nifty tool that helps users gain insight into the digital “buzz” that their scholarly work has received. Because Humanities Commons attaches a DOI to each CORE deposit, the analytics surrounding anything you upload to CORE can be tracked displayed using two free tools designed and provided by Altmetric.
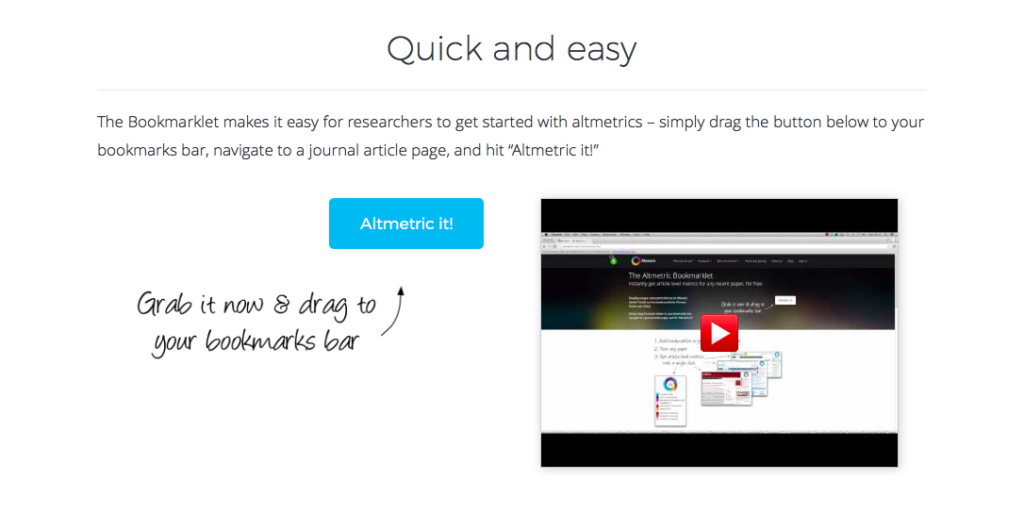
Bookmarklet for Researchers
The first tool is Altmetric’s “Bookmarklet for Researchers.” By adding this to your bookmarks toolbar, you will be able to immediately access metrics for any article attached to a DOI. To get started, first follow Altmetric’s handy one-step guide to installing the Bookmarklet.
The one-step guide you will find on Altmetric’s site.
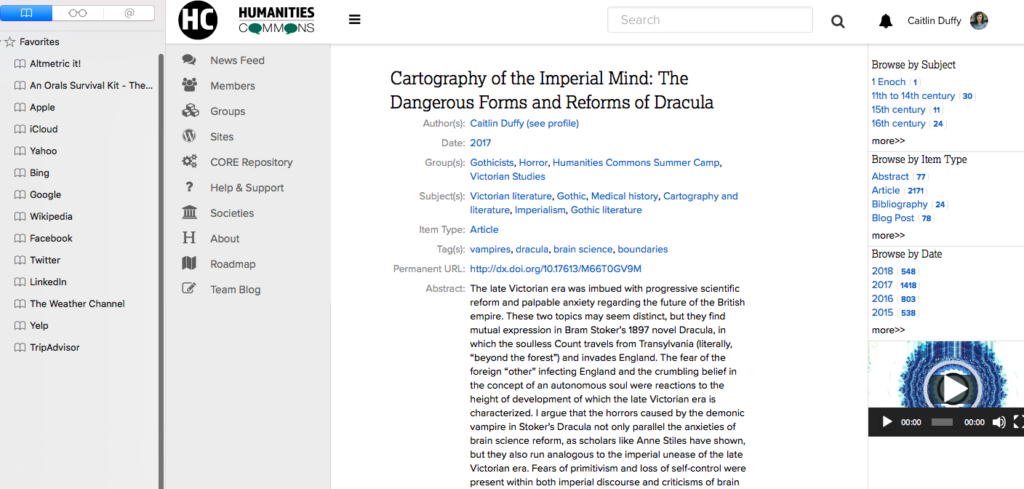
Once you have the Bookmarklet on your toolbar, take it out for a test run! Go to (one of) your (or anyone else’s) CORE deposit page and click “Altmetric It!”
The “Altmetric it!” tab is right at the top of my browser’s bookmark list.
You should see a doughnut-shaped graph and a counter, both of which reflect the number of digital “mentions” your deposit has received.
At the top right of my screen, the Altmetric doughnut has appeared!
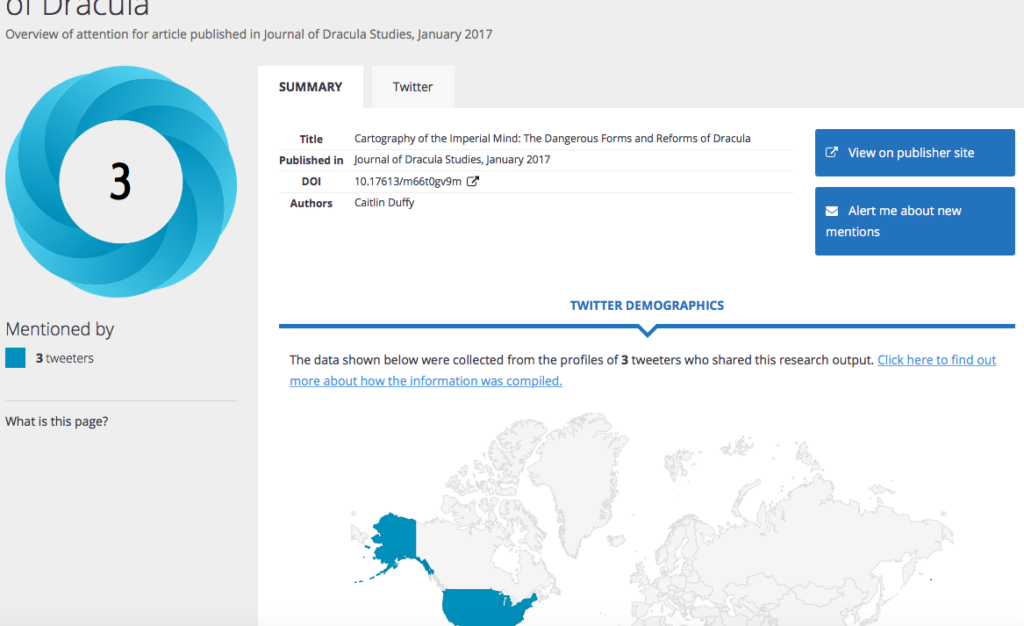
If you select “Click for more details,” which appears below the visualization and counter, a new page opens which contains even more information regarding your deposit’s digital life. Along with the doughnut graph and counter, you should now see demographic and geographic breakdowns of your deposit, as well as an option to view any posts that were made about it on a number of social media platforms, including, but not limited to, Twitter, Facebook, and Reddit.
After selecting “Click for more details,” I was taken to this page, which shows me even more information regarding the digital presence of my recent CORE upload.
I was recently really excited to learn about this tool for a number of reasons. First, you can learn more about the people who are downloading, sharing, and discussing your work online using the demographic and geographic visualizations. Secondly, the ability to look through a feed of the posts made about your work allows you to see (and, if desired, join) the discussion that your deposit has generated. As I’ve only just uploaded an article to CORE, I haven’t used Bookmarklet yet for my own work. However, I’ve noticed that the information provided by this tool is also helpful when looking at the work of others. For example, when I find a CORE deposit that really interests me, I use the Bookmarklet to see if a digital discussion surrounding the work exists so that I can join it or gain further insight on the work’s topic through reading the opinions and reactions of others.
Badges for Individual Researchers
If you discover that your CORE upload has generated a lot of discussion online, you should absolutely showcase the reach and influence of your work. The second free tool that I want to share with you for this mini-challenge is Altmetric’s free badges for individuals. These badges help you to easily add context and demonstrate the reach of your scholarly work to visitors of your site or online CV.
In order to add Altmetric badges to your site or online CV, follow the quick two-step process outlined on the Altmetric site. You basically just need to choose the type of badge you’d like, copy and paste the provided embed code to your page’s html, and let Altmetric know that you are using their badges.
The Altmetric page on individual badges provides a few examples of CVs and personal sites with embedded badges: (1), (2), (3).
The ability to provide quantifiable evidence of the importance and influence of your work will be a powerful addition to your professional site or digital CV. Once you’ve added these badges, anyone can quickly click and view all of the same information that the Altmetric Bookmarklet provides, even if they don’t have the Bookmarklet in their toolbar.
Share and Reflect
Please share any discoveries or questions that emerged as a result of exploring these two Altmetric tools. In particular, if you noticed any benefits not covered in the blog post, please tell us about it on our group page!
If you have any questions or if you run into any issues as you complete this challenge, fear not! Your camp director is here to help. Reach out to the Humanities Commons Summer Camp through any of the following contacts:
Humanities Commons: Post your question/concern as a new discussion thread in our HC Group.
This challenge will help you to use our CORE Repository to its fullest potential. This will allow you to not only locate and download open access scholarly work, but it will also help you to increase your own readership.
To complete our CORE challenge you must:
Find and download 1-3 CORE deposits that are relevant to your academic interests.
Upload at least one scholarly work of your own and share it with the HC Summer Camp group.
The purpose behind this challenge is twofold. First, we hope that a greater awareness of the open access materials available in the CORE Repository will help you to locate helpful documents as you design your courses, build projects, and complete research in the future. Second, by uploading your work to CORE, you will increase your readership, strengthen your digital presence, help build our open access repository, and establish a direct connection between your HC profile and your work.
Locating Relevant CORE Deposits
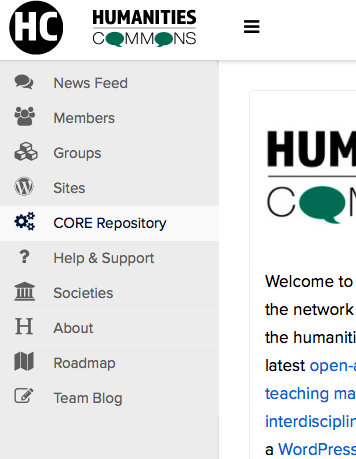
There are multiple methods of searching through CORE deposits; for now, let’s use the most direct method. Click on the “CORE Repository” tab located on the left-hand column of the homescreen, directly below the Humanities Commons logo.
The CORE Repository tab
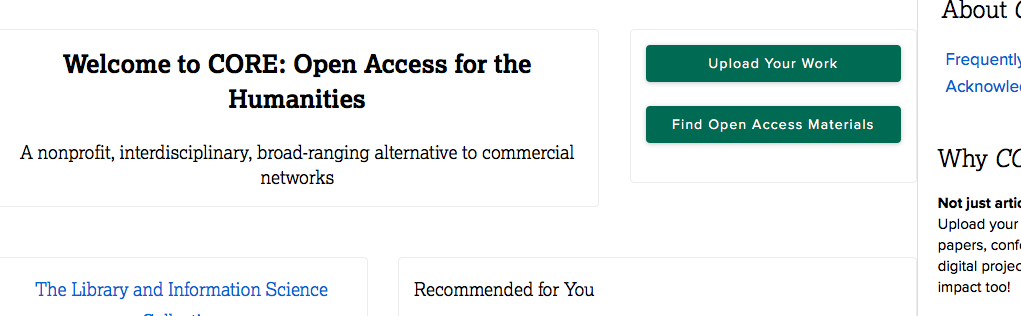
Once on the CORE Repository page, click the green button labeled “Find Open Access Materials,” located near the top right of your screen. This will take you to a searchable list of the entire CORE Repository. This page allows you to search through the repository using a number of different methods.
The “Find Open Access Materials” button is seen on the right of the screen
If you are searching for scholarly work that focus on a specific subject, select which fields you’d like to search using the appropriate dropdown menu and type in your search word into the text box. Click the magnifying glass, and you should see a list of CORE deposits that match your search specifications.
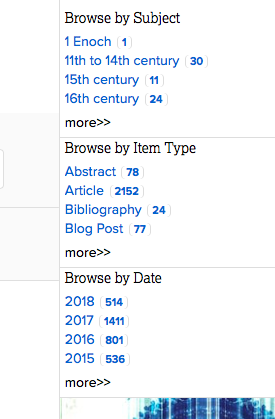
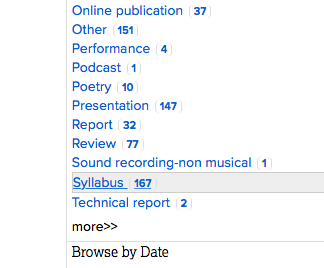
If you are looking for a specific type of scholarly work (ie: article, syllabus, book chapter, dissertation, podcast episode, etc.), use the filter options to the right of the page by clicking on the desired filters. For example, if I wanted to find syllabi for digital humanities courses, I would first click on the “Syllabus” link located under “Item Type” in the search filter list (you’ll have to select “More” a few times before you see this link), select “Subject” from the “Fields” menu, then type “Digital Humanities” into the search text box before clicking the magnifying glass. This search yields a list of digital humanities syllabi.
The three types of filters you can use to search the CORE Repository. In my example, I used the “Item Type” filter and found “Syllabus” by clicking on “more>>” a few times.
The “Syllabus” item type filter link
In my example, I choose “Subject” for my search field because I want to find any syllabus that deals with digital humanities as its subject.
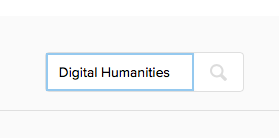
Finally, I typed “Digital Humanities” into the text box and clicked the magnifying glass to activate the search.
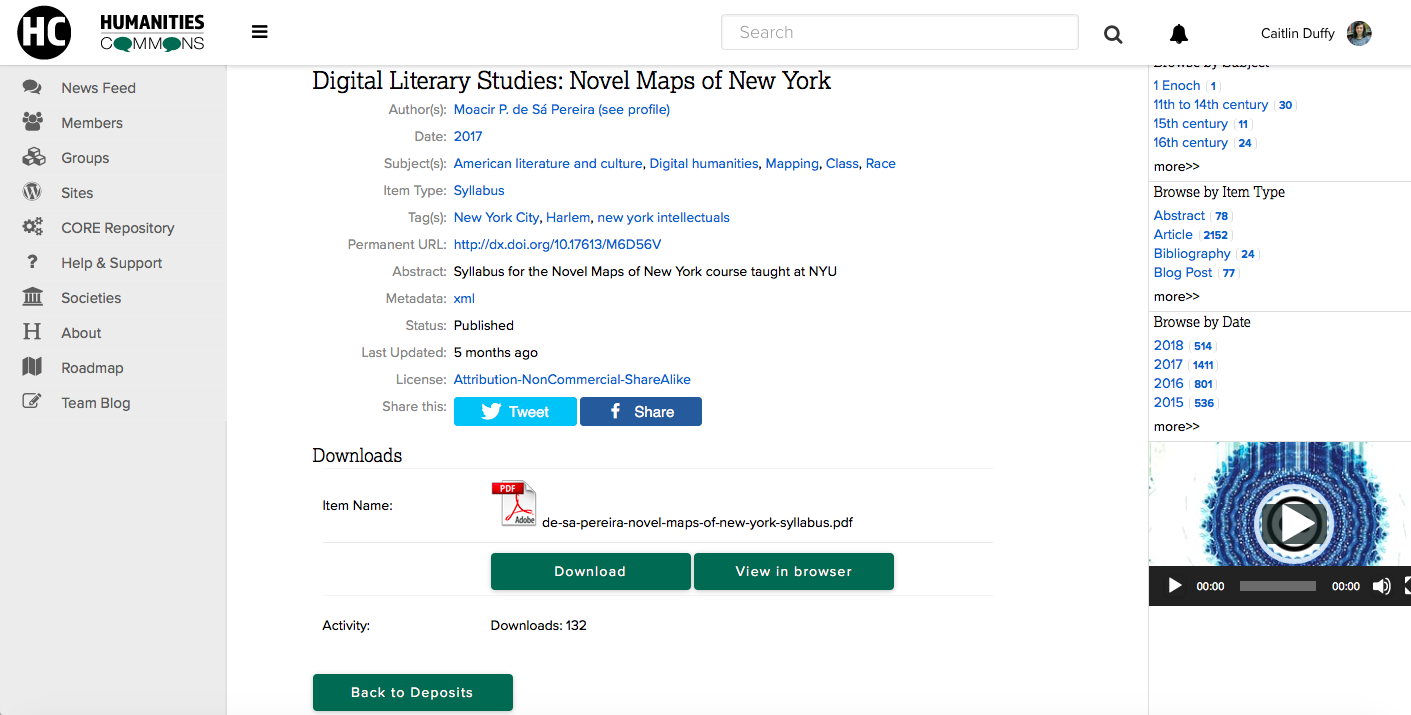
To find more information about a document, or to download it, users only need to click on the name of the document, which brings them to the document’s page. These pages typically contain an abstract of the work, a link to the author’s Humanities Commons profile, and other citational information, however this varies based on the personal preferences of the author. In order to download the document, go to the bottom of the page. There you will find a green button marked “Download.” You can also see how many times a document has been downloaded by using the counter located just below the Download button.
An example of a CORE deposit page. Notice the “Download” and “View in Browser” options as well as the download-counter at the bottom of the page.
Uploading Work to CORE
What should I upload to CORE?
Before uploading your work to the CORE Repository, you first need to determine what you are able and willing to upload. As you decide, consider the work you have ready to share. This work could be something more traditional like a published article, seminar paper, conference paper, book chapter, or dissertation, or it could be considered gray literature, like a podcast episode, data set, video essay, or syllabus. In fact, this isn’t even a complete list of the various types of scholarly work we welcome into the CORE Repository. Basically, if you consider the work to be academic, we will most likely accept it into the repository.
If the work that you want to upload to CORE has already been published, you’ll need to make sure that you are allowed to share it as an open-access document. Check the author’s agreement you signed, to see if you retained copyright, or, if not, see if the publisher allows you to share a version of the article. You can also use SHERPA/RoMEO to check a journal’s open access and self-archiving policies (this link is also available on the CORE upload form).
Librarians, especially scholarly communications librarians, are another great resource to help you determine the sharing rights of your published document. Additionally, there is always the possibility of negotiating from the standard agreement to get more rights granted, which a scholarly communications librarian could help you achieve.
Why should I upload my work to CORE?
There are a number of excellent reasons to upload work to CORE:
By uploading your work to CORE, you have guaranteed that it is archived and attributed to you.
Once uploaded to CORE, your work is quickly available to a large audience. Humanities Commons allows others to download documents from the CORE Repository without requiring them to register for the Commons or provide any of their personal information.
CORE deposits are easily discoverable because they are indexed by Google, Google Scholar, SHARE, Altmetric (Spoiler alert: Altmetric is the star of our next mini-challenge), and BASE-OA. Humanities Commons also allows you to share your uploads with specific groups so that the users who are most likely to read your work are alerted to it.
Humanities Commons assigns a permanent identifier known as a DOI to each CORE deposit. DOIs provide persistant, citable metadata for scholarly and creative works, including gray literature such as blog posts, syllabi, data sets, presentations, and video/audio files. This guarantees attribution to creators of CORE content.
How do I upload my work to CORE?
Once you’ve decided upon a document to upload to CORE, return to the CORE page and select the “Upload Your Work” button near the top left of the page. This will take you to the New CORE Deposit form. Simply upload your document and add appropriate information to the text boxes and menus. Keep in mind that the only required fields are the ones marked with an asterisk (*).
Most of this form is pretty self-explanatory, however, there are a few areas of the form that may be helpful to explain further here.
At the very bottom of the form, it asks you to select which Creative Commons License you’d like to apply to your CORE upload. This is important because these licenses determine what others are allowed to do with your work and whether or not you must be attributed when your work is used. This page provides useful explanations for each Creative License.
Also at the bottom of the form is a question asking you whether or not you’d like to embargo your deposit. Some publications require you to wait a certain length of time before making your work available as open access material. If you choose to embargo a document, you’ll select the length of time after which the upload should become available. You can check SHERPA/RoMEO to determine whether your publisher requires you to embargo the document. Again, a scholarly communications librarian may also be able to help you with this.
How do I share this document with the HC Summer Camp group?
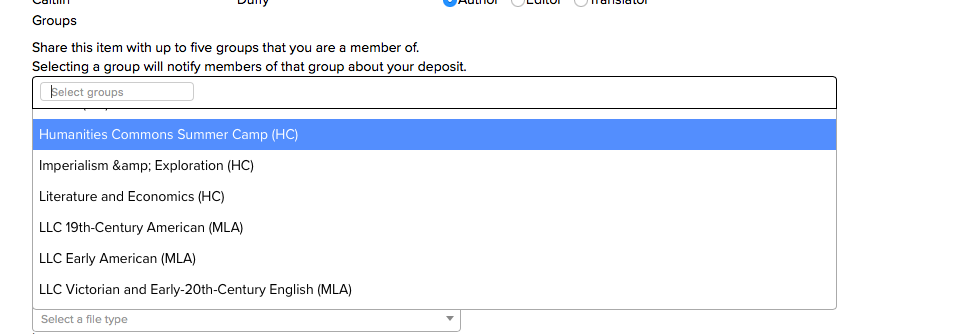
The New CORE Deposit form allows you to share your deposit with up to five groups. You will notice that you must be a member of the group in order to select it for this section of the form. Your deposit will appear in the CORE section of each of the groups you’ve chosen. For this challenge, make sure to share your work with the HC Summer Camp group!
On the new deposit form, you can choose up to five groups with which to share your upload.
Once you’ve completed the form, click the green “Deposit” button at the bottom of the form.
Share your completed challenge
Once you’ve completed this challenge, let our group know your challenges and discoveries. Did you learn anything through this challenge? Which CORE deposits did you find and download? How did you find them? Did you come across any challenges or difficulties? Did you share your CORE deposit with the group? If so, what is it? How did you choose what to upload for this challenge?
If you’re on Twitter, please share that you’ve completed the third challenge using our #HCSummerCamper hashtag. You should also share your upload on social media!
I look forward to hearing your experiences and checking out your CORE deposits!
If you have any questions or if you run into any issues as you complete this challenge, fear not! Your camp director is here to help. Reach out to the Humanities Commons Summer Camp through any of the following contacts:
Humanities Commons: Post your question/concern as a new discussion thread in our HC Group.
Interested in completing an extra networking challenge?
Our second mini challenge involves creating a Humanities Commons group of your own.
Why Should I Create a New Humanities Commons Group?
There are a number of reasons you might start a new group on Humanities Commons, but perhaps the most important reason is that there is a need for this sort of group. While looking for a group to join in order to complete Challenge #2, did you discover that we are missing a group that you might like to join? For example, when I first joined Humanities Commons, I realized that nobody had built a group for all graduate students on the Commons, so I created one myself.
By creating a group, you provide other members interested in or connected to the group’s topic a space to connect and share work, opportunities, and ideas. While our groups share these similar benefits, there are three major different types of groups that you can create.
Using Groups for Different Purposes
On Humanities Commons, there are many different groups that serve many different purposes. While creating your own group, you’ll need to decide its type and purpose. Humanities Commons offers different levels of visibility for your group. Your selection of a visibility level for the group should be directly tied to your group’s purpose. Here are a few examples to get you started:
Public Group: Public groups are completely visible to everyone and anyone can join simply by clicking the “Join Group” button on the group’s page. Choosing this visibility is advisable for groups that are focused on scholarly disciplines and/or academic interests. Example Groups: Medical Humanities, Digital Humanists, Education and Pedagogy, LGBTQ Studies, etc.
Private Group: In private groups, users must request membership and be approved by a group admin or moderator in order to join the group. Private groups are still listed in the Humanities Commons group directory but their content and activity are visible only to accepted members. Choosing this visibility option is advisable if you’d like your activity to remain private while still allowing Humanities Commons users to see your group in the directory and request to join it. This setting might be especially good for working groups. Example Groups: 2016-17 Proseminar Fellows, Graduate Students, Connected Academics, etc.
Hidden Group: Under this visibility setting, your group will not be listed in the groups directory or any searches. Only users who receive an invitation can join and see the group content and activity. Choosing this visibility option is advisable if you want to keep your group and its content entirely private. This might work best for groups from a specific department or school who are not looking for any outside members.
Creating a New Humanities Commons Group: The Basics
In order to create a new group, first go to the Groups page by click on “Groups” in the left-hand menu below the Humanities Commons logo. Once you’re on the page, click the green “Create a Group” button near the top of the page.
This will take you to the form for new groups. You will be asked to input information regarding your group, including its title, privacy setting, and description. A few areas of the form are not required, including the group’s cover image and photo, as well as the group’s site. While these aspects are not needed, you might consider adding them in order to build your group’s appearance and presence online. Images help to make your group appear more inviting, active, and professional.
A group site can help to raise more awareness of your group and it can provide a secondary space for your group to discuss key issues. A site might be especially helpful for a private or hidden group because it can be a space to share your group’s work with the public. That being said, make sure that you are able and willing to maintain a group site before you build it!
Gaining Group Members
A newly created group always feels a bit lonely. You’ll want to get people to join your group quickly because this will lead to a more active group, which will, in turn, cause even more people to join.
Advertise on Social Media: Use your other social media accounts (ie: Twitter, Facebook, Reddit, etc.) to get the word out about your Humanities Commons group. Chances are you are already connected to other like-minded academics who may be interested in your group’s topic. Ask your members to also share the group on their social media accounts.
As you share your group on social media, consider what sort of posts gain traction on that specific social platform. For example, will adding images or hashtags to the post help it to both be noticed and spread? Should you highlight something specific about your group rather than just the group’s title?
Celebrate exciting discussions, new CORE deposits, events, etc. that occur within your group on social media. Your followers and friends will be encouraged to join your group by the wonderful work that is taking place.
Entice potential members by gamifying the situation. Offer fun and creative incentives, such as “The tenth person to join our group will get a personal shout out on Twitter” or creating a quick digital graphic celebrating group milestones, such as the gaining of a twenty-fifth member.
Advertise by Word of Mouth: Do you work with academics and educators who might be interested in joining this group? Tell them about it! Are you attending a conference which focuses on your group’s topic? Make a point to let fellow attendees know about your group while networking.
If your group is centered around a department at your university, school, or place of employment (ie: “Stony Brook University English Graduate Students”), you may also want to print out flyers advertising your group. Leave or post these in a common area, such as a break or copy room.
Encouraging Activity Within Your Group
Once you have group members, you need to make sure that your group is active. There are a number of different strategies you can take to help encourage participation within your group.
Low-Stakes Questions: This works just as well in online groups as it does in classrooms. If you post a low-stake question, members will feel more comfortable answering it, as it’s something that they feel confident in answering. These questions should not be the sort that would take someone a while to come up with an answer. They serve mainly to open up dialogue and allow your members to test the waters before really engaging in deeper conversations. Below are some examples.
Introductions: Briefly introduce yourself before asking other members to do the same. You can provide clear guidelines or even a list of information for these introductions to include, or you can let your members come up with what they might share. The introductions can include the member’s name, institution/workplace, designation, academic interests, current research, his or her reason(s) for joining the group, and/or a fun fact.
Goals: Ask members not only why they joined the group, but what they want to gain from being a member. In an ideal world, what will this group accomplish and/or provide? Their answers will not only help to spark dialogue and activity, but they may also give you new ideas about what to do with your group.
Recommended Reading/Viewing/Listening: Have you recently read a book or article that touches on topics important to your group’s focus? Or maybe you’ve watched a movie or listened to an album that does the same? Craft a recommendation post that not only encourages your members to check out your recent discovery, but welcomes them to share their own recent finds. Even if you don’t have anything in mind to recommend to the group, you can craft a simple discussion post that asks others to share the things they’ve recently discovered and loved.
Victories: Start a discussion by asking members to share a recent professional or personal victories. You might want to make this a weekly or monthly tradition if it goes over well with your members. Sharing victories will not only inspire good feelings in your group members, but this activity can also potentially become a treasure trove a good ideas and best practices. For example, members may share a lesson plan or classroom activity that worked really well with their students.
Group Traditions: Creating weekly, monthly, or even annual traditions on your group can give your members even more of a reason to keep up to date with your group. They can also help to create a group culture of community and support. These traditions can take place in a discussion topic thread that you start.
Victories: Ask group members to share their victories of the week/month/year. These victories can be big or small, personal or professional. What matters is that they matter enough for your group members to want to share. Sharing victories will not only inspire good feelings in your group members and dialogue in your group, but this activity can also potentially become a treasure trove a good ideas and best practices. For example, members may share a lesson plan or classroom activity that worked really well with their students.
Check-Ins: Have group members share something that they are celebrating or something that they have learned or discovered that week/month/year.
Celebrations: Highlight and celebrate the work shared by your members on CORE and other areas of the Commons. When group members deposit their work in CORE and share it with your group, make a point to shout out their contribution on your group’s discussion page. A simple comment reminding other members to check out the new deposit and thanking that member for sharing it could help to encourage further participation. For example, members may begin shouting out each other or sharing their other work (ie: blogs, digital projects, etc).
Group Events: The “Discussion” option in HC groups can allow people from across the globe to connect and ‘hang out.’ Take advantage of these affordances by scheduling times for digital group events. Remember to use the group’s calendar once your event is scheduled!
Book Clubs: Select a book/article/movie/etc. pertinent to your group. It might be easier to start with something small like an article. Rather than choosing the text yourself, you may also want to create a poll and/or ask your members what they’d like to examine. You might also want to choose articles uploaded and written by group members. Once you’ve decided on a text, encourage your members to read the text by a certain date. On the scheduled date and time, you and your group members can meet in the discussion group to chat about the text. Book club meet-ups can become a monthly tradition for your group. After the meeting, you or another group member can post a summary of the discussion.
Topic Meets: Choose a topic or question pertinent to your group. Schedule a time for group members to meet online to discuss the issue.
Expert Meets: If you find out that a member of your group has a recent accomplishment (ie: a great lesson plan, a published book, completion of a digital project, etc.), ask them if they would be willing to discuss it with the group. Schedule a time and date for the group to meet digitally. Encourage the “expert” to have a short 10-15 minute presentation of their accomplishment and for group members to arrive to the digital meet-up with questions for the presenter.
Share Your Completed Challenge
Of course, most of the steps described in the blog post will not be completed in a week. This is something that you will continue to build and maintain beyond the scope of this summer camp.
That being said, we would love to see your new groups! Share your new group with the HC Summer Camp by using the discussion thread designated for this mini-challenge. If you’re on Twitter, please share your group using the #HCSummerCamper hashtag. This is a great way to get new members, so you might also want to include a brief description of your group’s focus. Check out (and join) other campers’ groups as you complete this advanced challenge.
If you have any questions or if you run into any issues as you complete our second mini challenge, fear not! Your camp director is here to help. Reach out to the Humanities Commons Summer Camp through any of the following contacts:
Humanities Commons: Post your question/concern as a new discussion thread in our HC Group.